I had scheduled sinus surgery at the end of March, so I wanted to fit in a mini-expedition before then. As with most of my adventures these days, I love to start and finish from home, so the entire expedition is human-powered. Plus, there is so much to still explore from home that why would I need to go further afield?
I used the excellent MTB Project site to search for an interesting off-road route. This time, I found the Ten Mile Creek route that looked perfect. Somewhere new. Singletrack but not too hard (remember, I’m a middle-aged dad riding a loaded rigid bike. So, yeah, nothing too hard).
Conveniently, it was also close to Sugarloaf mountain, so naturally I included that ascent in my route and the superb gravel road off the backside of the mountain. To get there, I could utilize the canal and stay in one of the hiker biker campsites.
Perfect! Route done. Next was braving the chaos of the garage to dig out all my camping gear, since it had been a year since I last camped. With that done, I was ready.
Below, I share some photos from the 2-day trip. And even though the whole trip was less than 24 hours door-to-door, it packed in everything. Easy miles along the canal, a beautiful campsite, swoopy new singletrack, mountain hairpins, lovely views from the lookout, and, what I’m always searching for, the opportunity to push myself physically whilst exploring the great outdoors.
Day 2 was one of the best days I’ve had on a bike. Mega!
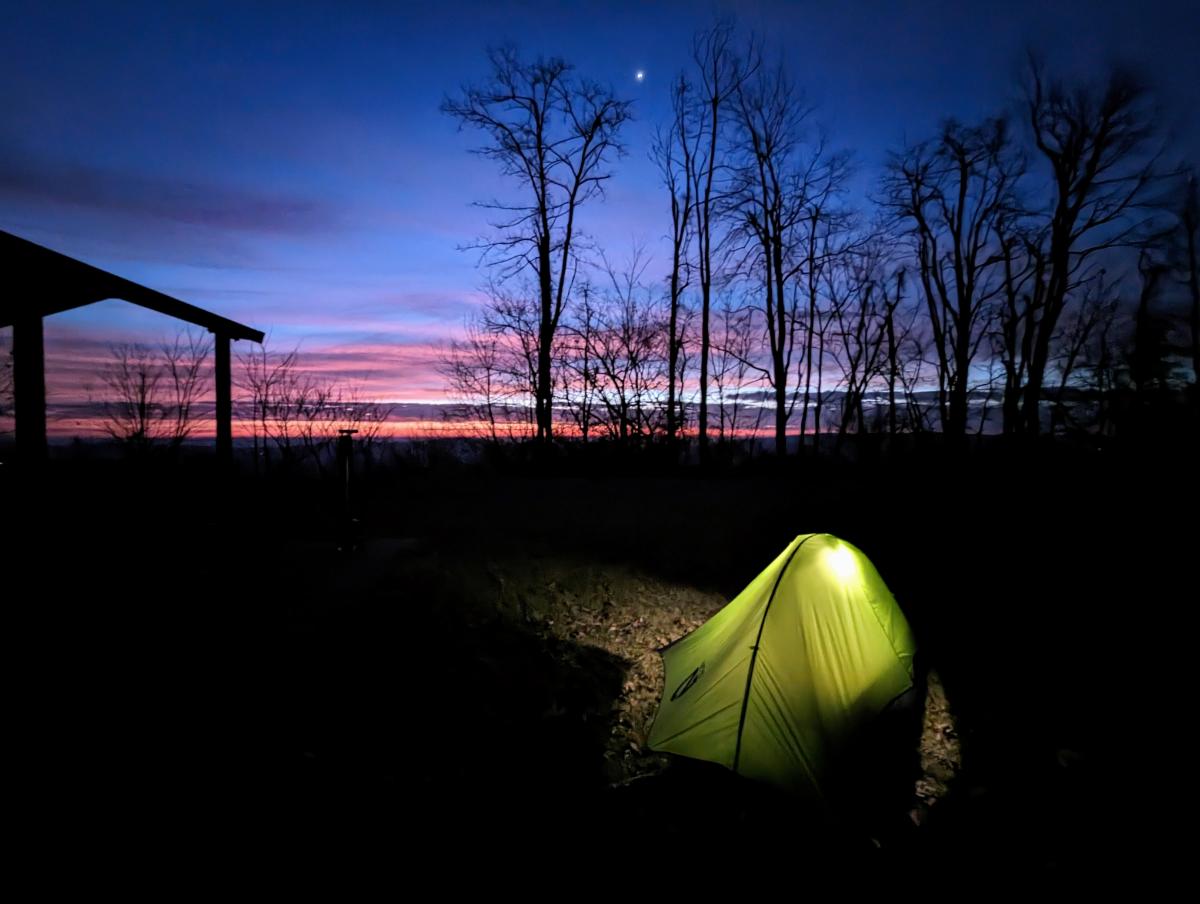
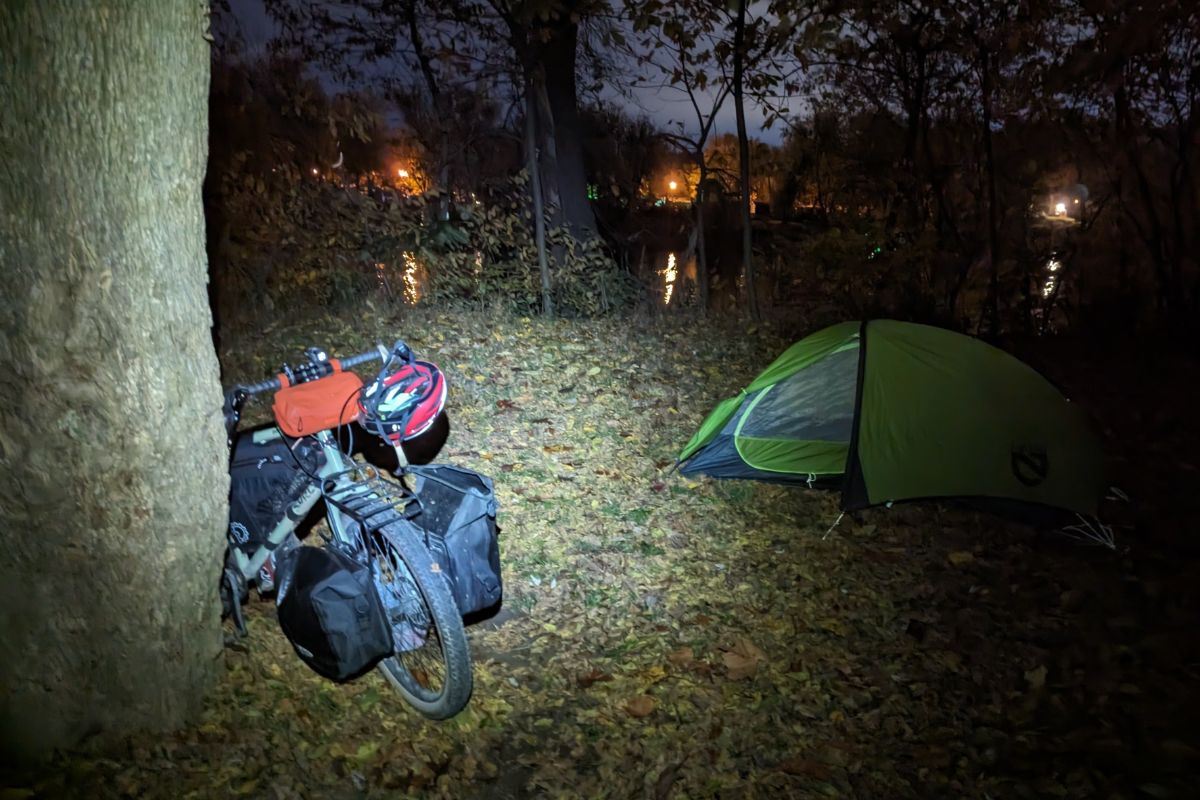
Day 1: Home to Turtle Run hiker biker campsite
27.5 miles / 154 ft ascent
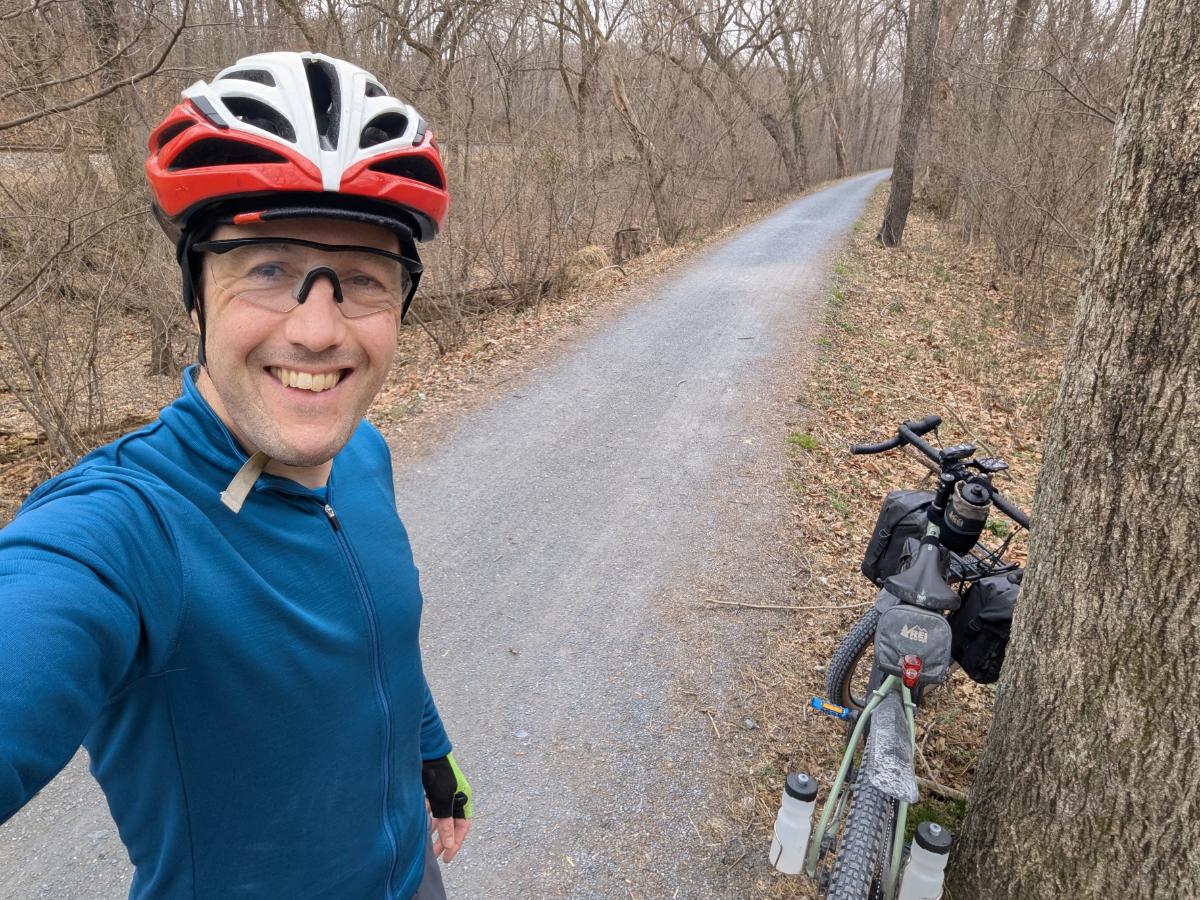
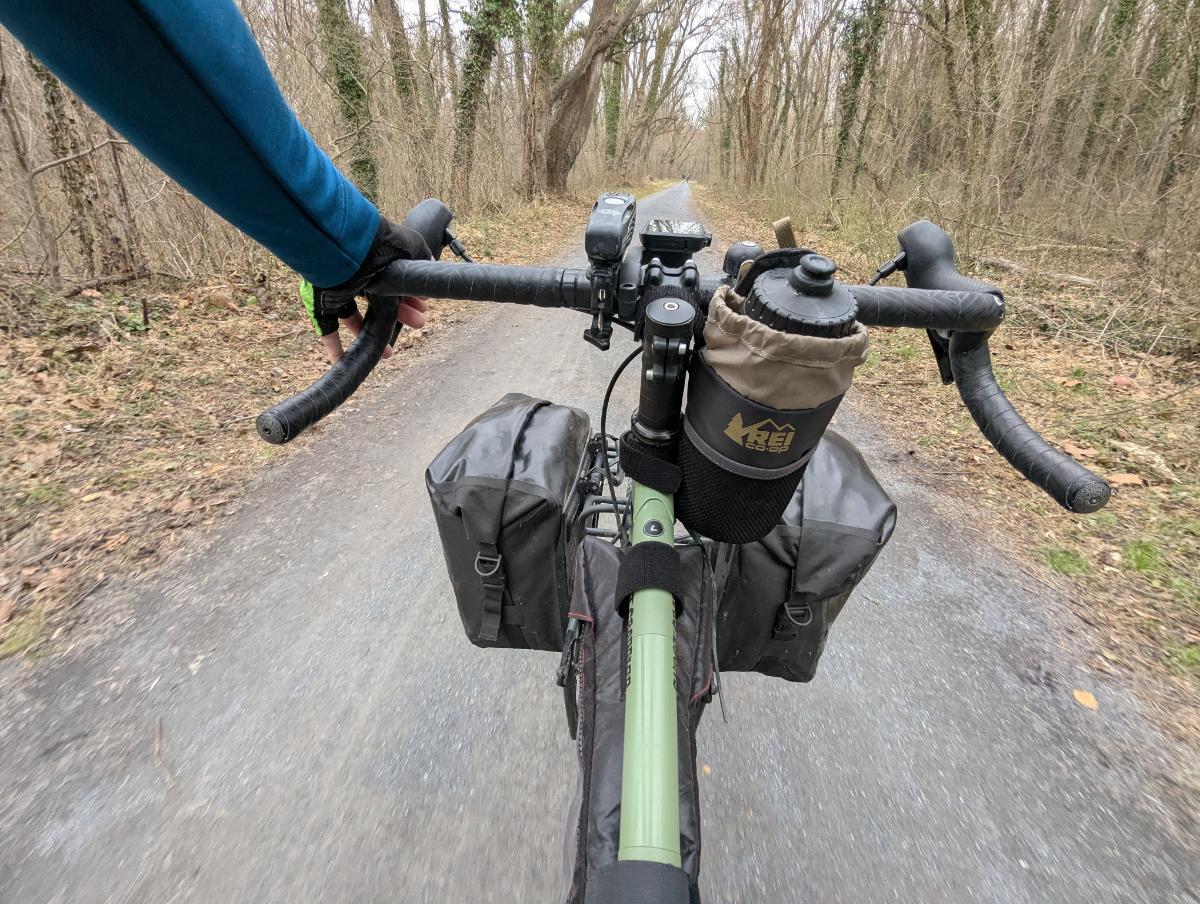
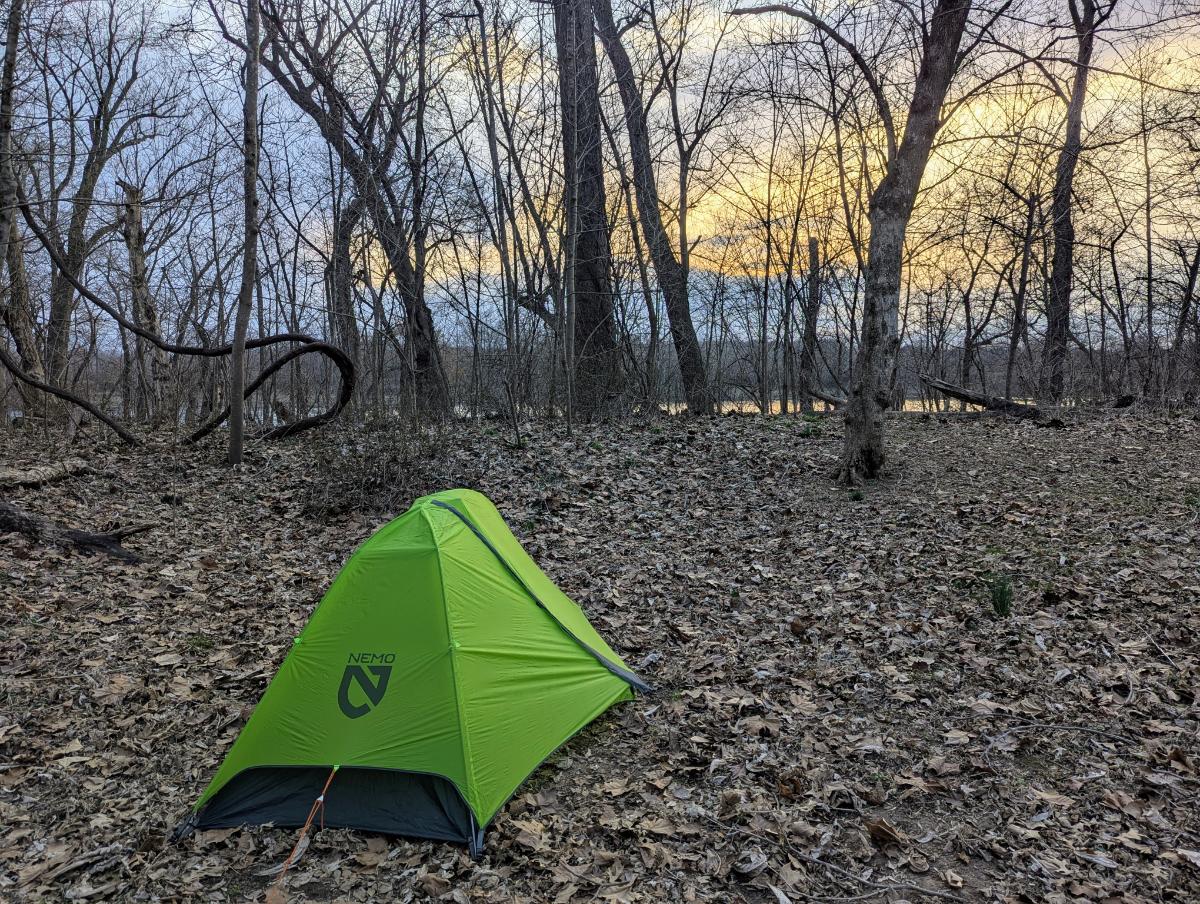
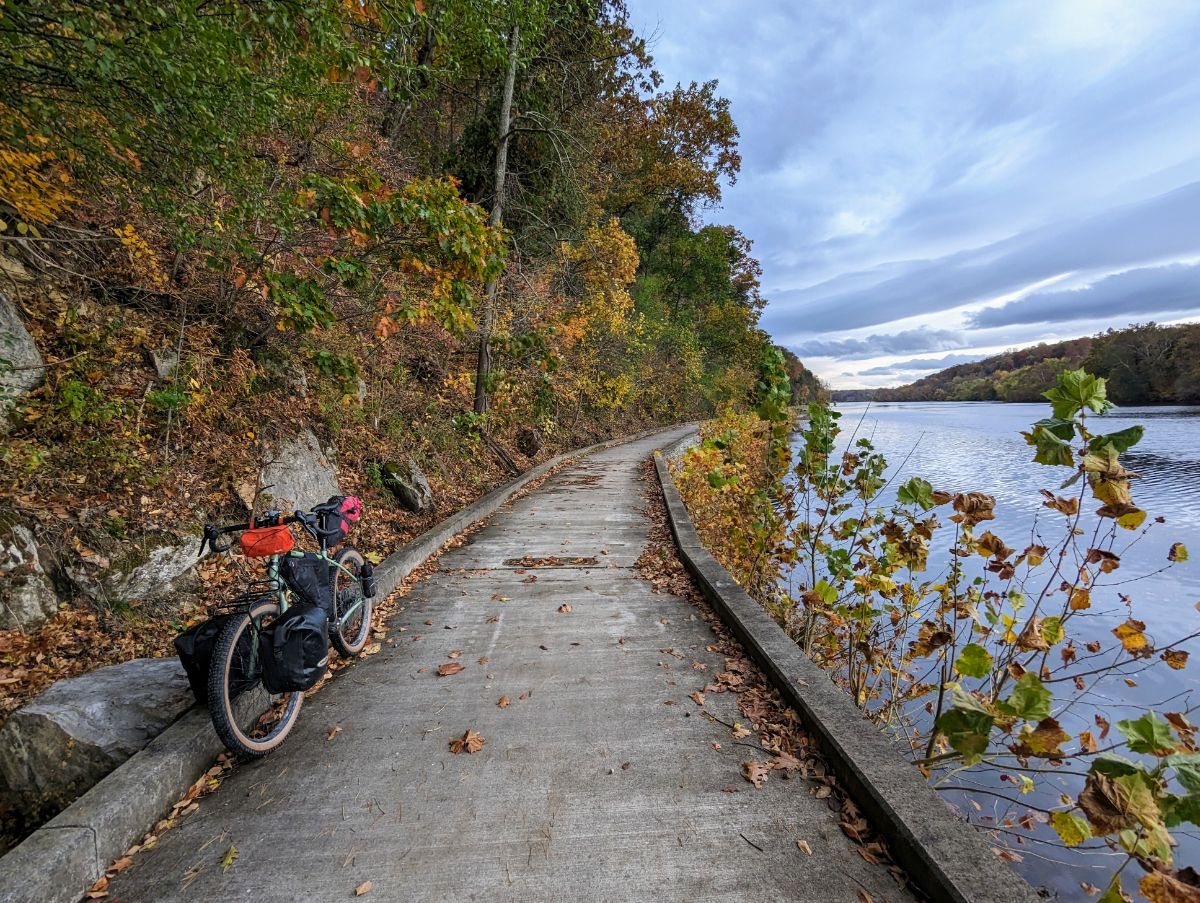
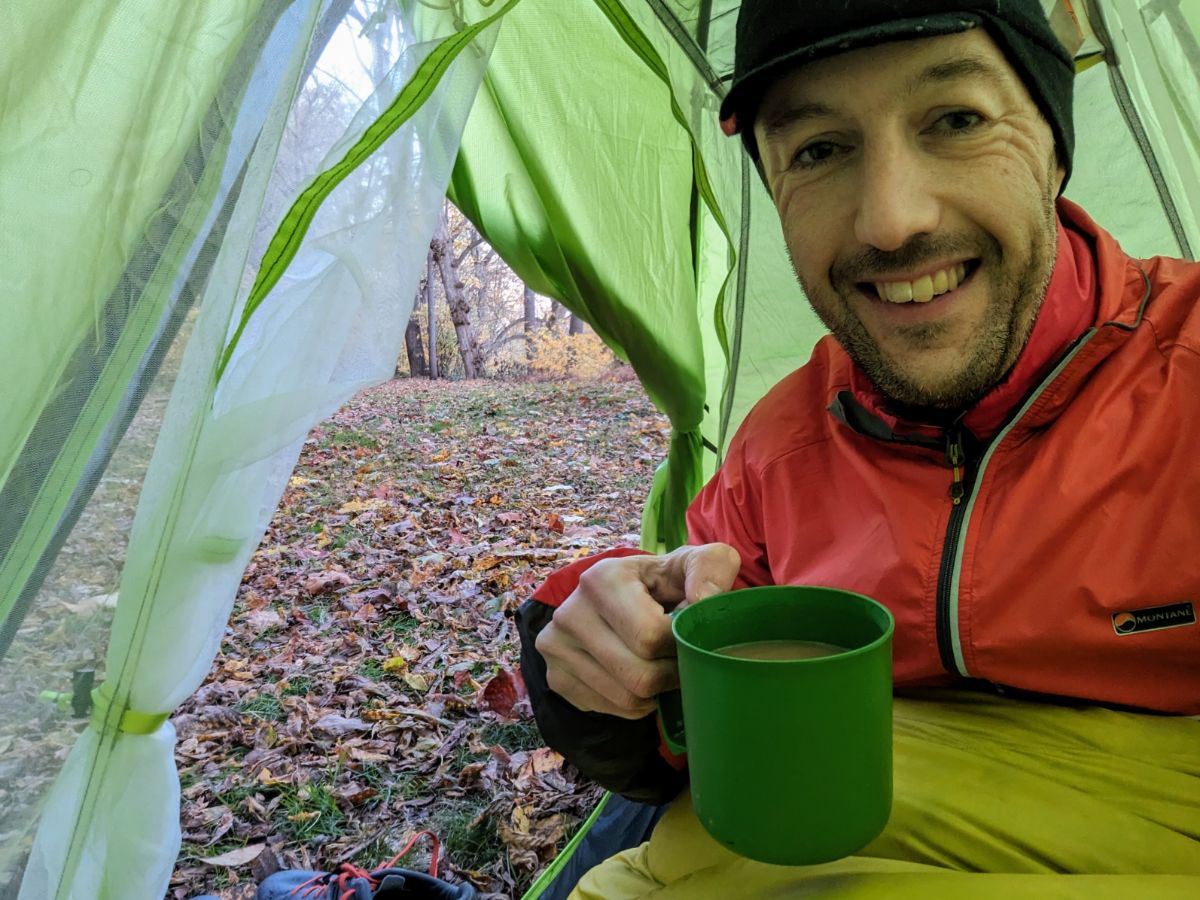
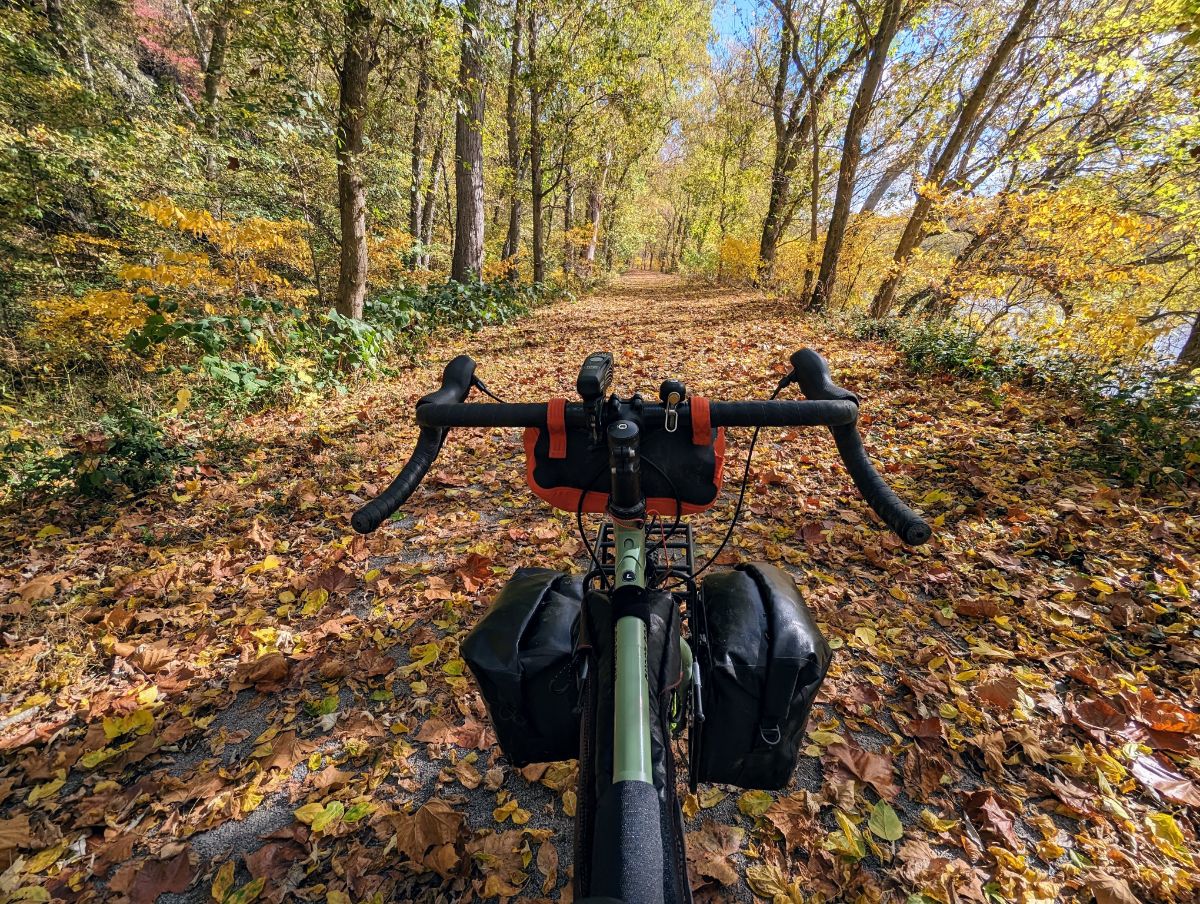
Surly Grappler in bikepacking mode, with the front panniers mounted higher to avoid catching anything when riding singletrack.Day 1 was along the C&O canalLove this trail!View from the cockpitCamp at Turtle Run hiker biker campsite along the C&O canalBeautiful evening light at camp.Camp routine: dinner, mug of hot tea, and recording the day’s events in my journal.
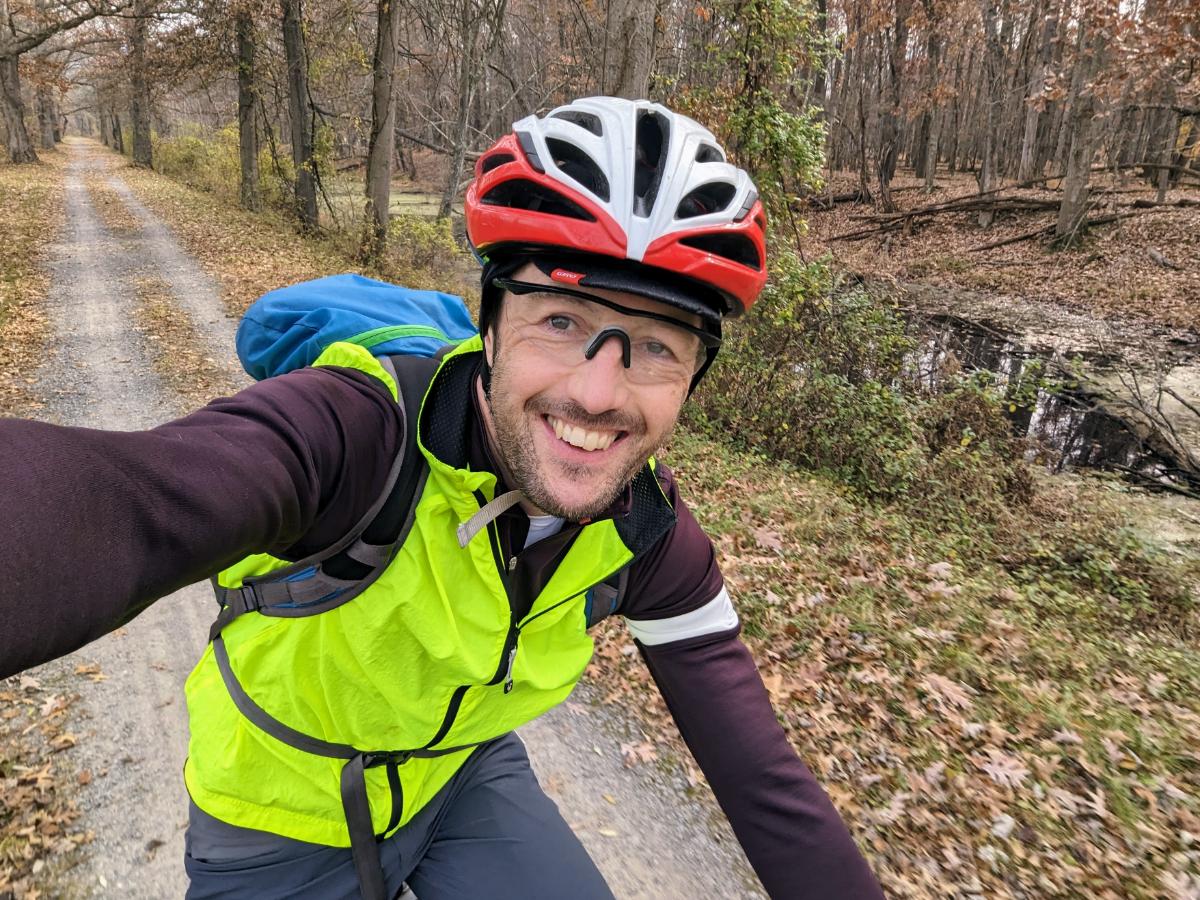
Day 2: Turtle Run campsite to home, via Little Seneca Lake and Sugarloaf mountain
61.5 miles / 4,341 ft ascent
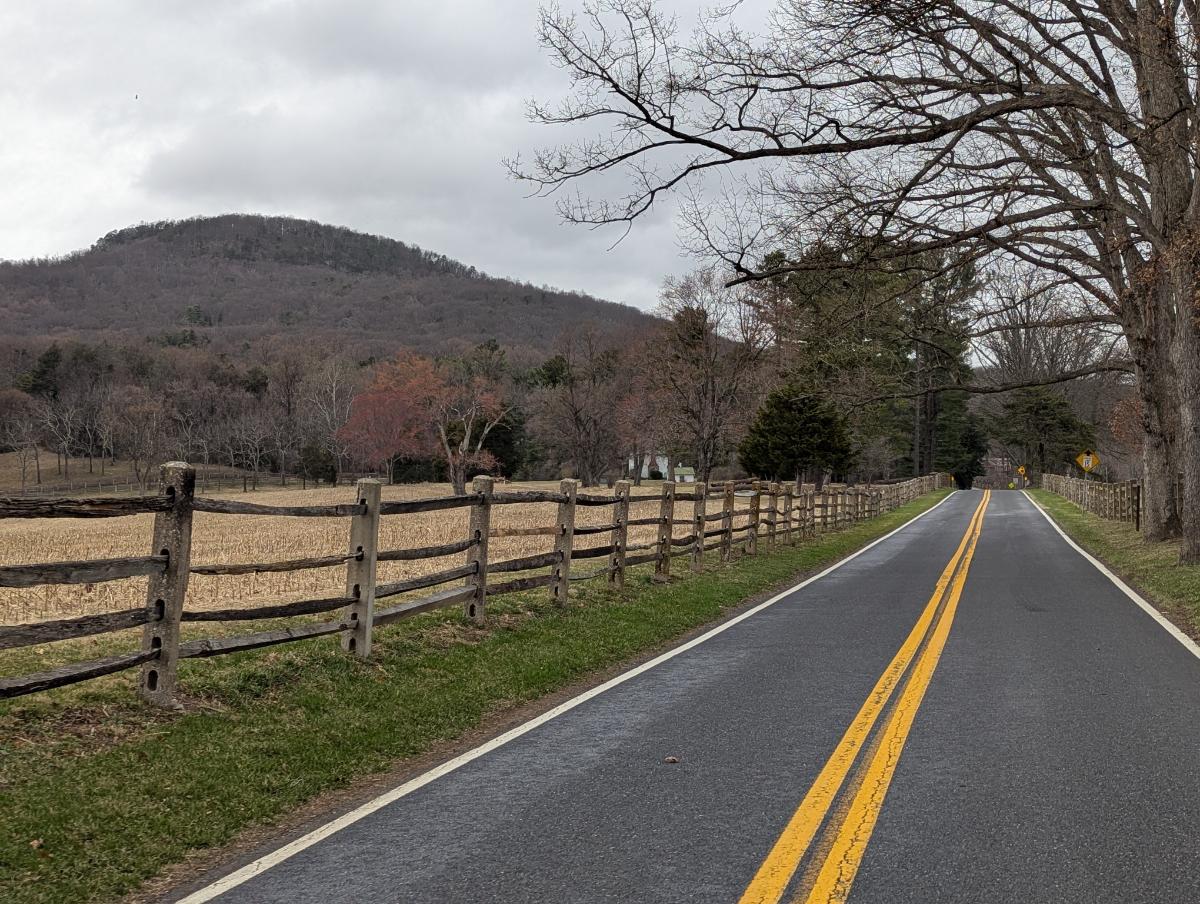
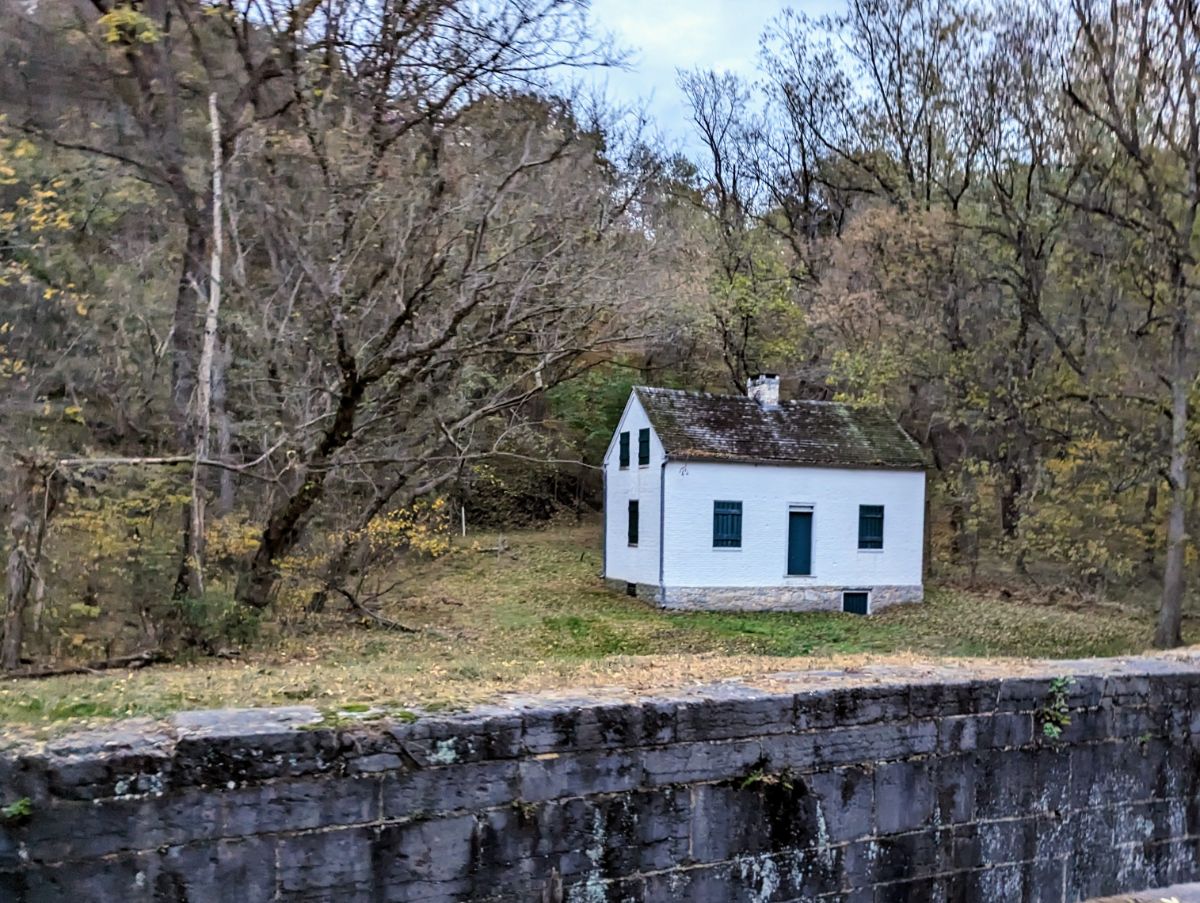
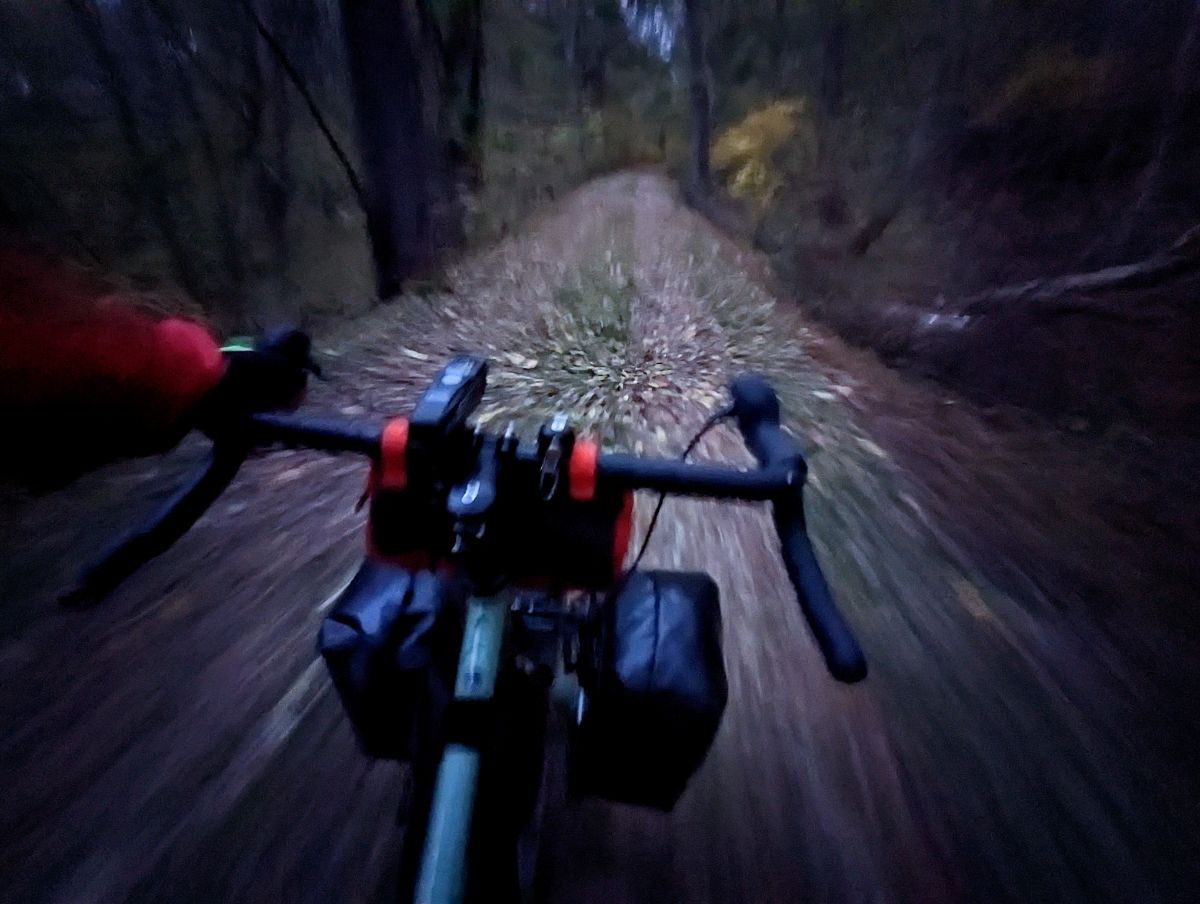
The lock house at lock 25, where I turned off the canal towpath to head into Maryland.On to the quiet backroads of Maryland.Because the water pumps were not operational along the C&O canal yet, I had to stop in Poolesville to refill my water bottles.On to the singletrack around Little Seneca Lake!More swoopy singletrack.At the end of 10 miles singletrack. Harder and slower than the road! But more fun! 🙂Approaching Sugarloaf mountain.One of the hairpins on the ascent of Sugarloaf mountain.View from the top of Sugarloaf.Enjoying the gravel road on the backside of Sugarloaf, on my way home.
I’ve been fascinated by self-powered adventures, especially those starting and finishing at home, for as long as I can remember. Adventures that are self-contained and car-free.
It’s the ultimate freedom. You have everything you need with you and no set destination to return to. (Well, apart from home, unless you’re setting off on something epic of course…)
For the past few years, I’ve been combining two of my favorite activities: standup paddling and biking. I’m fortunate to live at the confluence of two major rivers on the East Coast of the US. One has a bike trail running alongside it. It’s the perfect territory to perfect the art of using bikes and paddle boards to access and explore rivers.
So when my friend Chuck texted me recently, asking if I wanted to paddle the next day, I said yes immediately. I knew I would bike to and from the river with my board. I packed that night so I could get an early start.
The following morning, I biked for 22 relaxing miles along the bike trail to our rendezvous at the boat ramp. My paddle board was rolled up and strapped to the top of my front pannier rack. Apart from slightly heavier steering, the effect on my bike handling was minimal.
At the boat ramp, I blew up my board and strapped the bike to the front whilst waiting for my friends to arrive.
When Chuck and Brenda arrived, they were intrigued by my car-free setup. Questions abounded. How is the bike strapped on? What’s the extra weight like? Is the board stable? To which I answered, yes! We launched and paddled into the main current.
The board was perfectly stable, even with the extra weight up front. The effect on board handling was negligible with the bike positioned over the centerline. One difference though: with all those sharp objects in front of me, I was extra careful to not fall forwards! Especially when navigating through the occasional bumpy riffles.
Our merry flotilla floated downstream enjoying the aquatic world gliding beneath our feet. We spied huge catfish, 70-year old river clams, and old tires beneath the surface. We startled a great blue heron and, later, saw a pair of bald eagles fly overhead as we continued downstream.
Eventually, busy-life demanded my return and the spell of the river was broken. We took out at a deserted boat ramp.
Here, I deflated my board, rolled it up, and strapped it on the front of my bike. I bid my companions farewell as my adventure continued. I swapped paddle strokes for pedal strokes and rode home, the river by my side, with a grin as wide as the bends of the river itself.
Route Tips
Many rivers have parallel roads and boat ramps. It’s likely you can create your own multi-sport loops in your neck of the woods.
Some pointers to keep in mind:
You want to be comfortable standing on your board before you try paddling with a bike strapped to the board as well.
Start with a small goal to get used to the setup and extra weight, both cycling and paddling.
Stick to flat water to minimized the chances of falling forwards onto your bike.
Keep in mind that it takes about 20 – 30 minutes to transition from the bike to being on the water and vice versa.
Biking Setup
Any bike will do, but it’s probably advisable to have wider tires for stability when you’re carrying the extra weight. Plus, you’ll likely want to fit a pannier rack so eyelets are a good idea (though it is possible to fit a rack without eyelets).
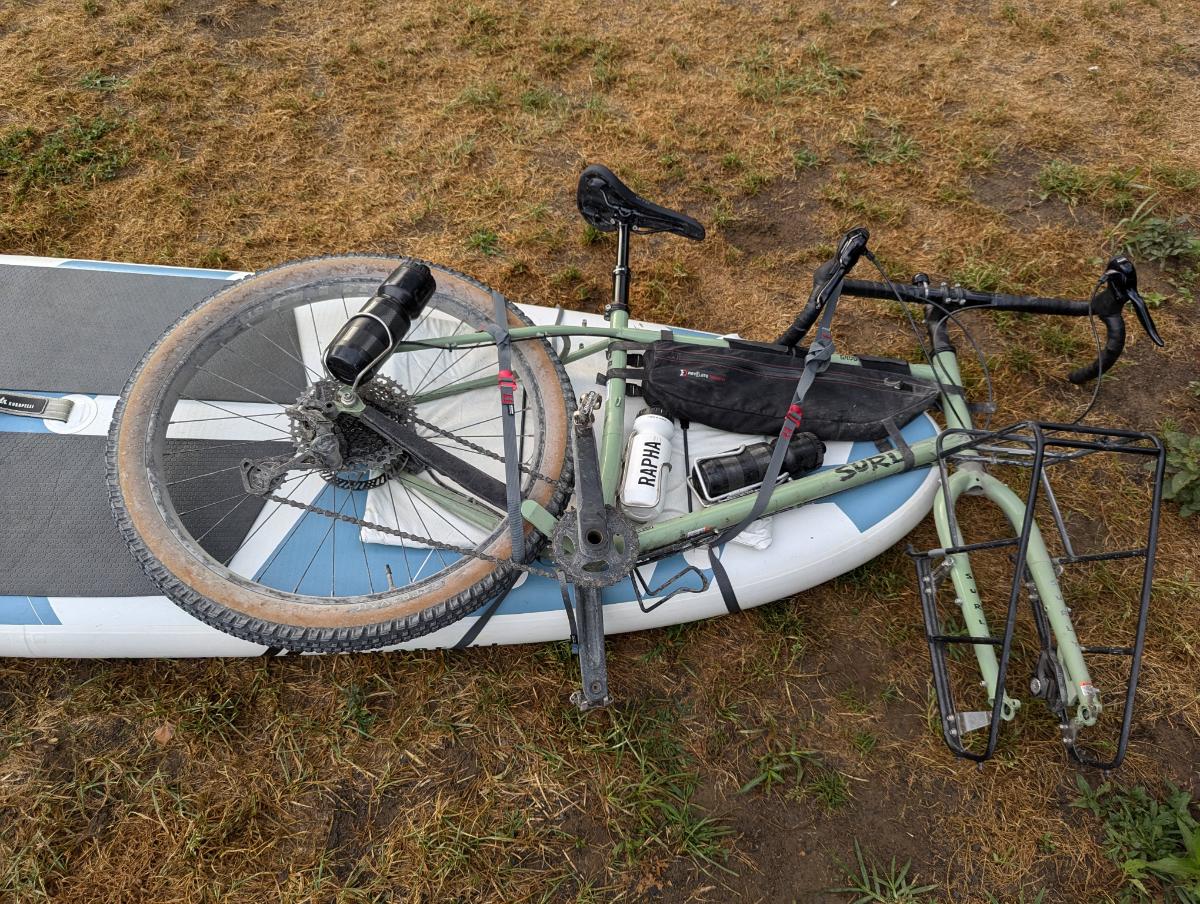
I’m riding a Surly Grappler, which is an all terrain drop-bar mountain bike. It’s ideally suited to this kind of adventure touring.
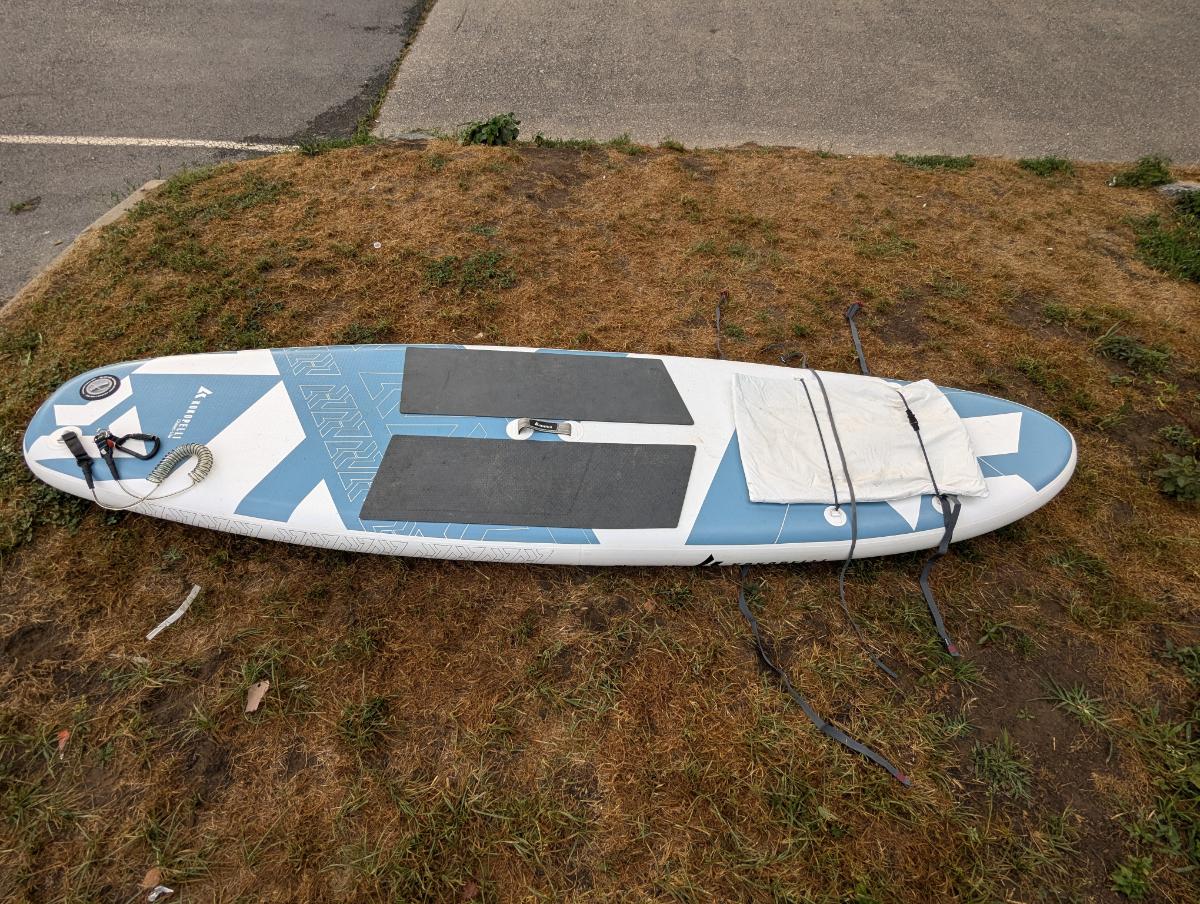
The Kokopelli Chasm Lite is the lightest paddle board in the world, so it’s uniquely qualified for this type of adventure. It rolls up small enough to sit comfortably on the top of a bike rack (or fit into a backpack if you’re a hiker!).
Most other paddle boards are too large and heavy to carry on the bike itself. You could carry them on your back in a huge backpack, but that’s not comfortable for longer distances. For heavier and bulkier boards, you can undertake car-free trips using a bike trailer. But the whole setup is much bulkier.
To carry a lightweight paddleboard on your bike, start by rolling up the board with the paddle inside the roll. Then wrap this board inside of the foam pad that you’ll use later on to protect the board. This SUP sushi roll is strapped on top of the front pannier rack.
A rear pannier rack would also work, but I prefer to have the weight up front. I find that heavily laden bike with all the weight over the rear wheel makes the steering very light and squirrely, which has led to one bad crash for me on a previous tour.
Carry the pump, fin, and other accessories in a frame bag or a seat pack.
PFDs (life jackets) are bulky. So far, I’ve found the best place to carry them is to strap them around the seat pack, which works pretty well. If you do this, make sure the straps are cinched super tight to avoid the PFD hitting your rear wheel.
Paddling Setup
Most paddle boards can comfortably carry a bike as you paddle downstream or across a lake. One caveat, you should only try this if you’re a fairly experienced paddle boarder with good balance. You don’t want to be falling on top of a bike. They’re sharp and expensive. To carry a bike on your board:
Tuck a pad under the front bungee straps of the board (to protect the board). Use a cutoff from a foam camping pad, or foam packaging, or something similar.
Remove the front wheel of your bike.
Strap the bike over the front of the board, with the handlebars twisted.
Put the drive side facing up (gears away from the board).
Rotate the pedals so the lower pedal hangs over the side of the board (it will dip in the water occasionally so you could optionally remove it if you like).
Use a couple of webbing straps under your board and threaded through the front D-ring eyelets to secure the bike (I like using Sea to Summit Accessory Straps).
You actually want the bike shifted a few inches further back than shown in this photo. So that the fork sits across the nose of the board to prevent it turning.
Strap the front wheel and any baggage on top of the bike.
Keep snacks, a drink, sunscreen, etc. accessible in a small dry bag clipped on top of the bike or to the handle in the center of the board. That way you won’t have to dig around under your bike to find essentials on the river.
Tie off loose strap ends to keep your board.
Set this all up next to the water. The board is an absolute beast to carry once it’s loaded with 40 lbs of bike gear (speaking from experience…).
Before paddling off, give the board a wobble-test to check everything is secure. Think about what would happen if your board flipped over. Is everything tied down?
Multi-day Expeditions
So far, I’ve done one multi-day bike SUP tour, over 3-days. But that was before I moved to a lightweight SUP, so I used a trailer to carry my board when biking. The trailer works fine, but it’s bulky and annoying when you’re cycling and then more gear to strap onto the board.
My goal is to add a pair of front panniers and a full frame bag to the lightweight bike/board setup above, negating the need for a trailer. I think that’ll be the best way to do multi-day bike SUP tours.
Watch this space…
Further Resources
A few other crazies have tried bike SUP adventures over the years, here are their stories:
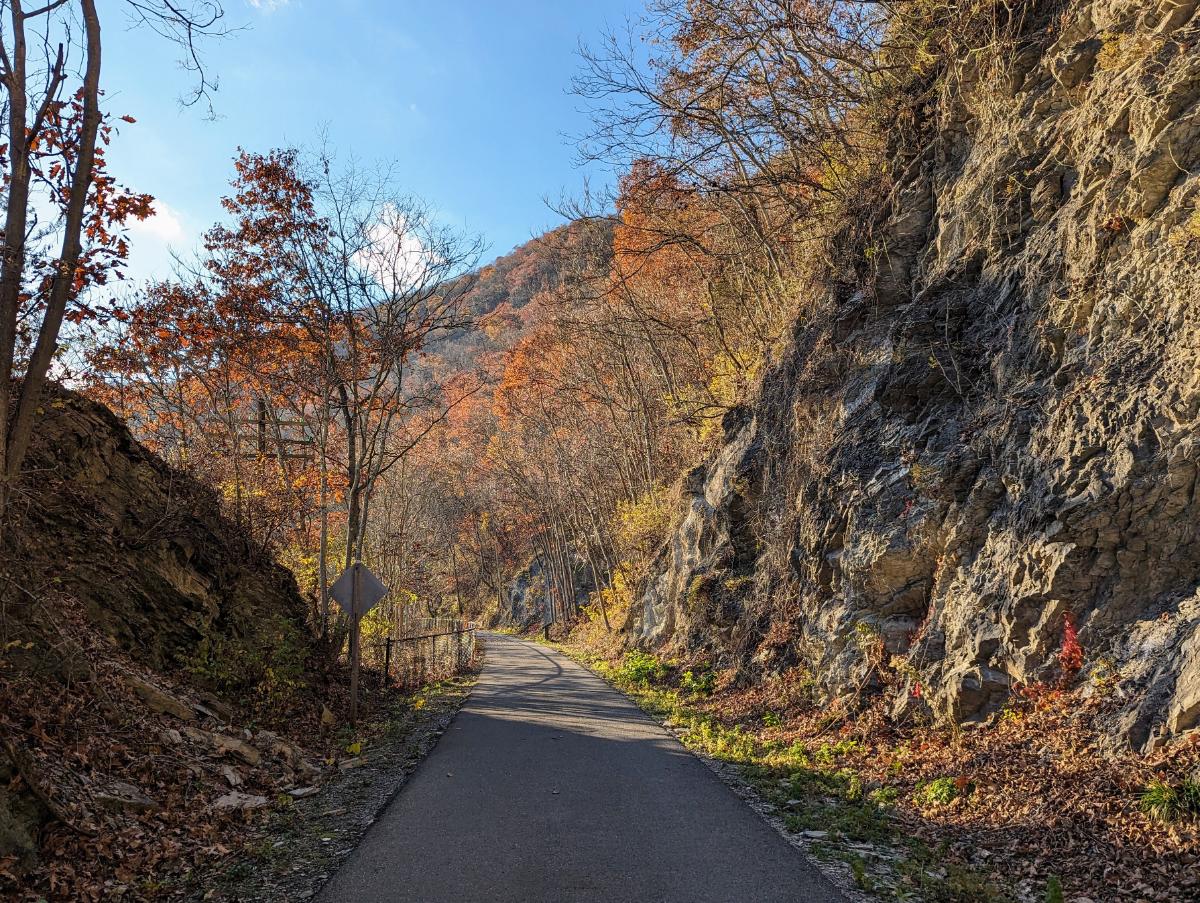
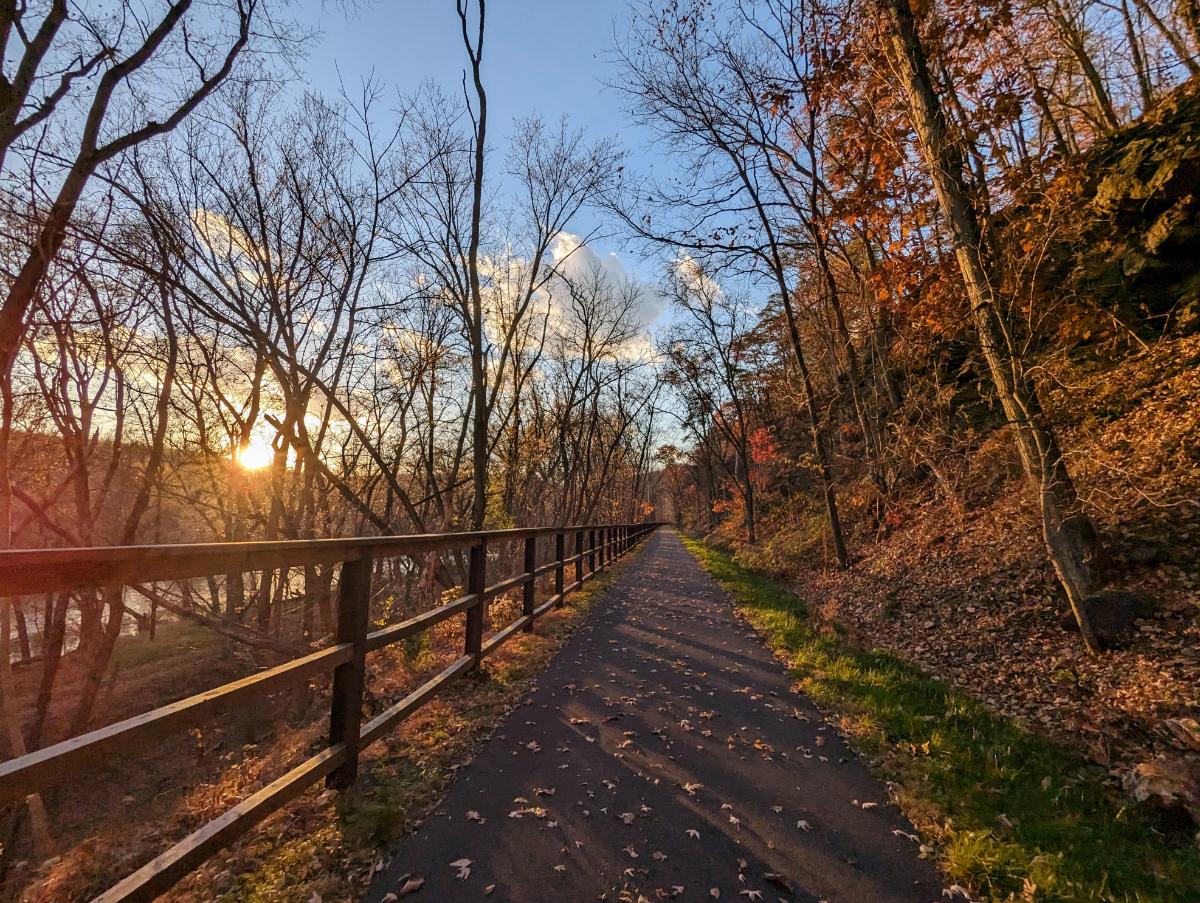
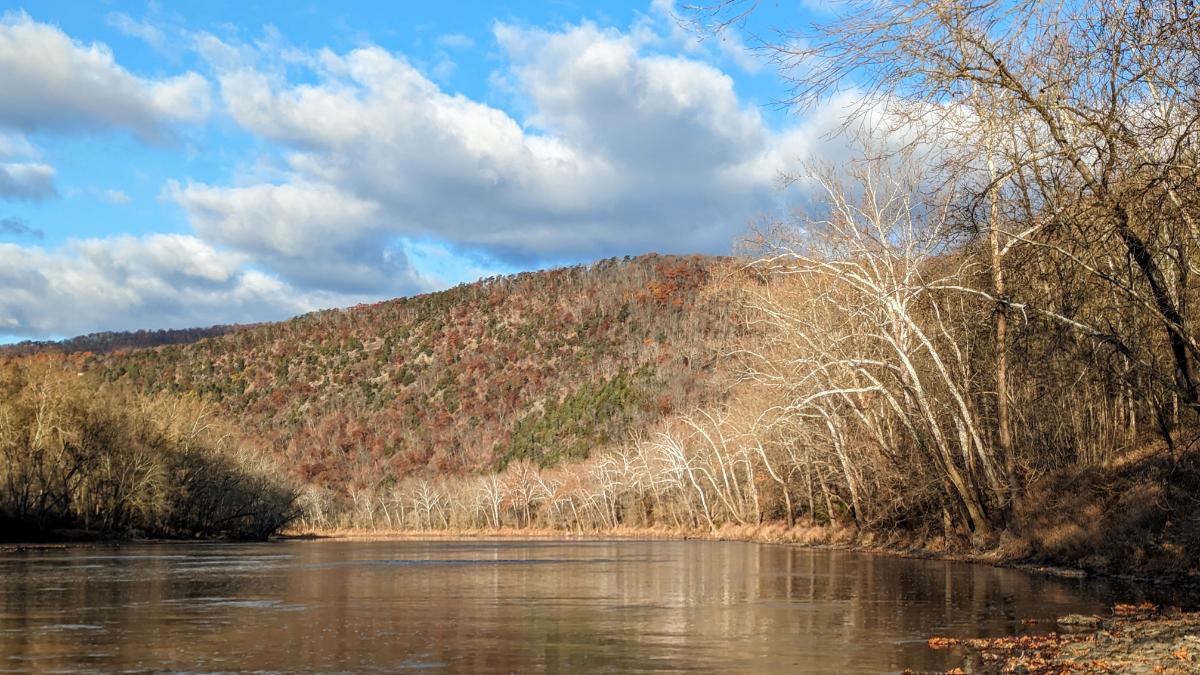
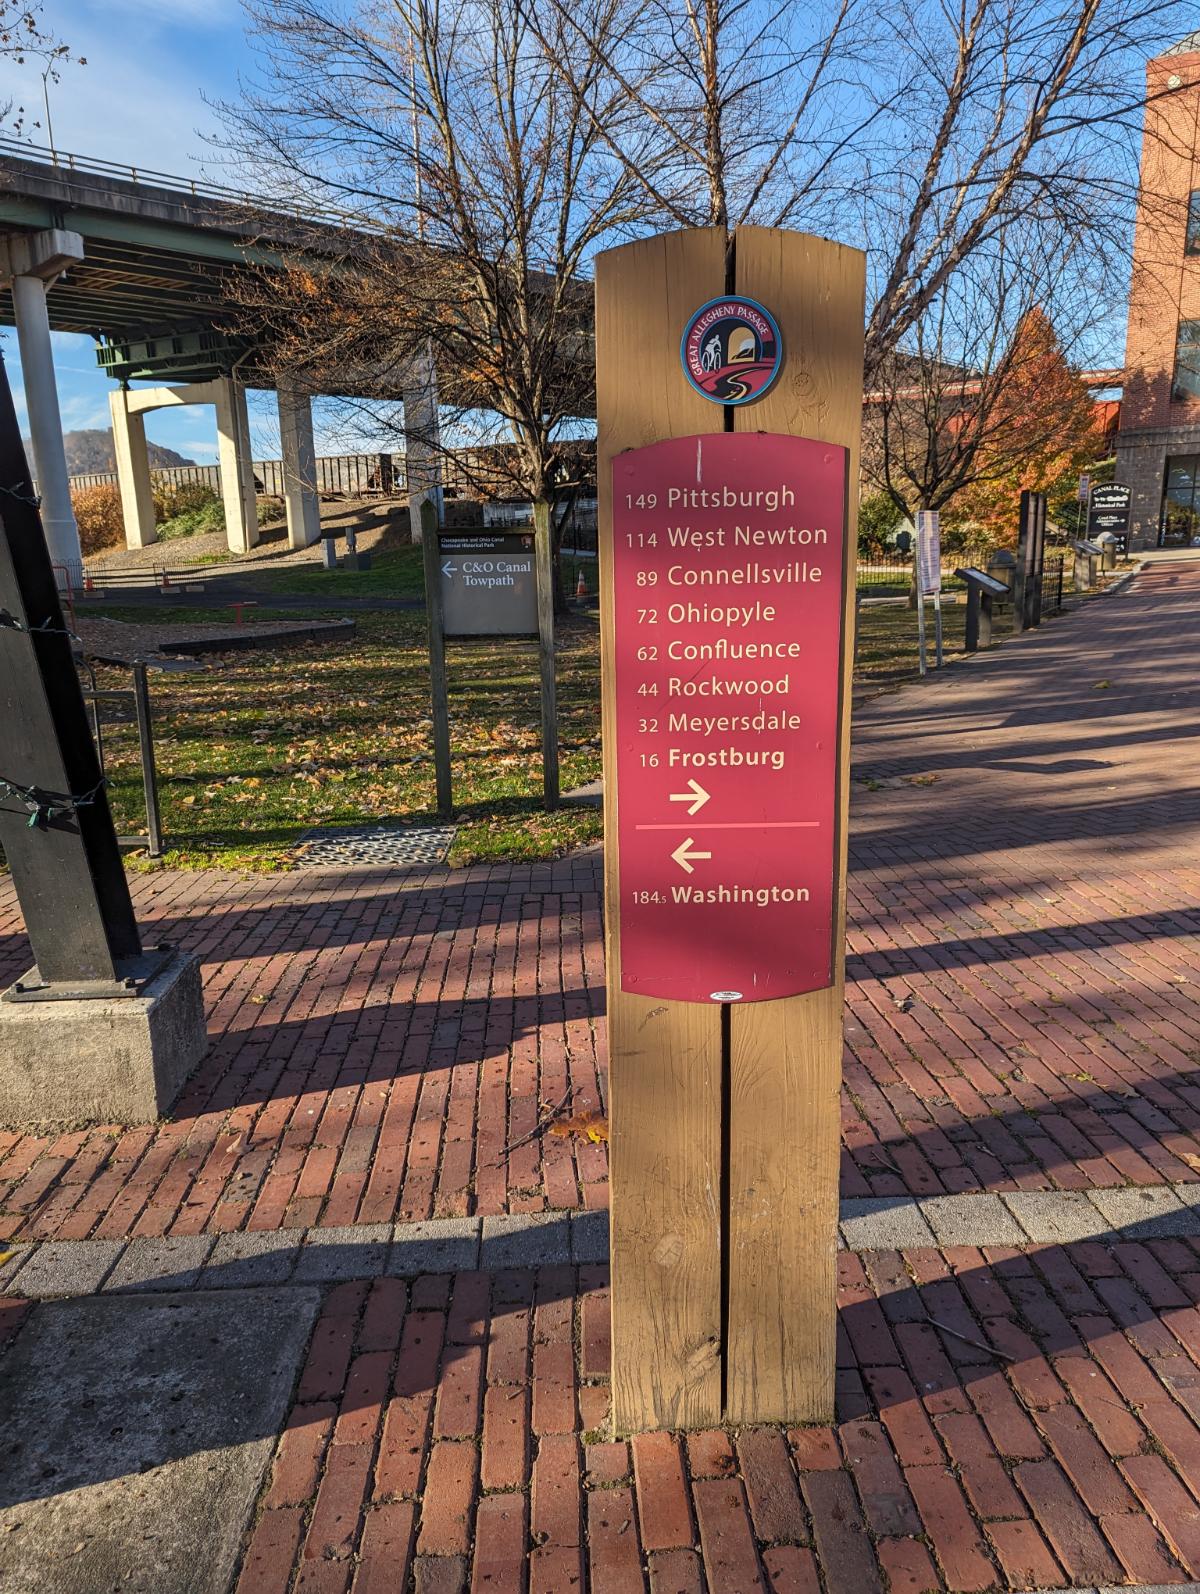
Some photos and stories from a fall bike tour along the C&O canal and GAP trail:
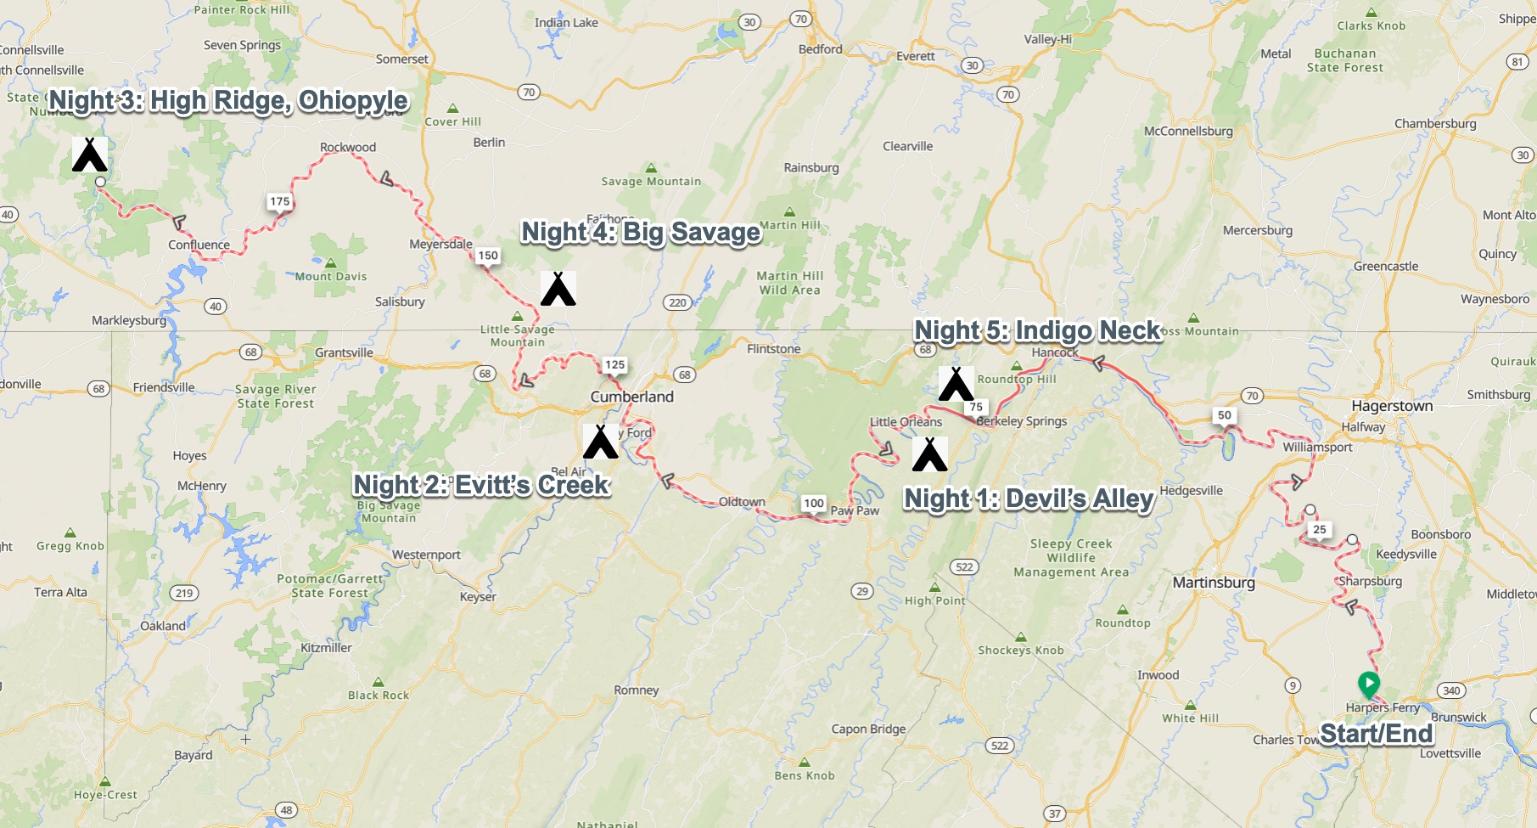
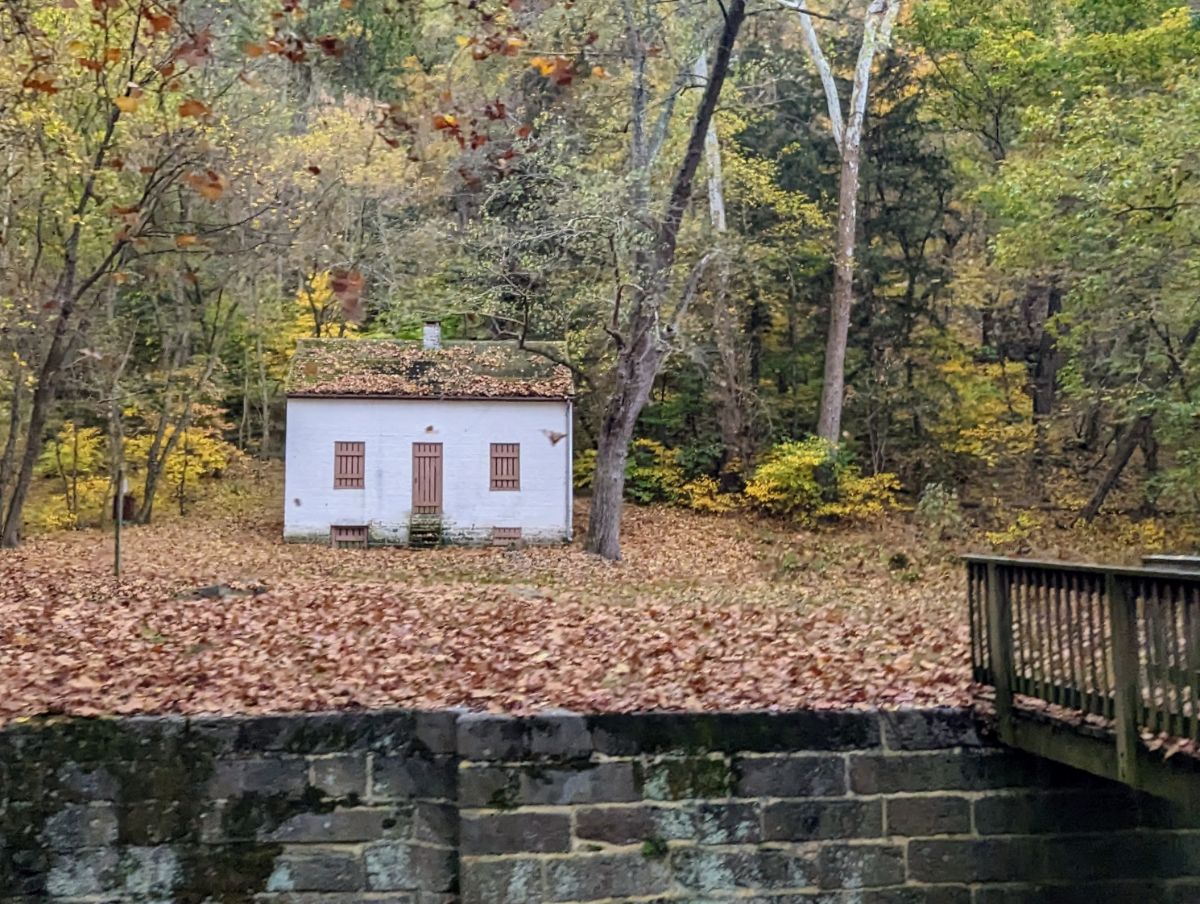
Day 1: Harpers Ferry to Devil’s Alley campsite
86.6 miles / 7 hrs 53 mins
Liftoff! Running the lowrider front panniers and frame bag again. Taking the extra dry bag on top of the front rack and the rucsac to carry 7 full days of food and winter clothes.Stunning views at the point, Harpers FerryBeautiful morning reflection on the Potomac, taken near DarganI love riding in the fall.The raised towpath at Big SlackwaterWilliamsport basinC&O Bicycle shop in Hancock, Maryland, where I stopped for a snack breakRiding the scenic Western Maryland Rail Trail, parallel to the C&OGorgeous evening on the WMRTClosing in on Devil’s Alley campsite as the light fadedCooking dinner in the dark!
Day 2: Devil’s Alley campsite to Evitt’s Creek campsite
36.0 miles / 3 hrs 33 mins
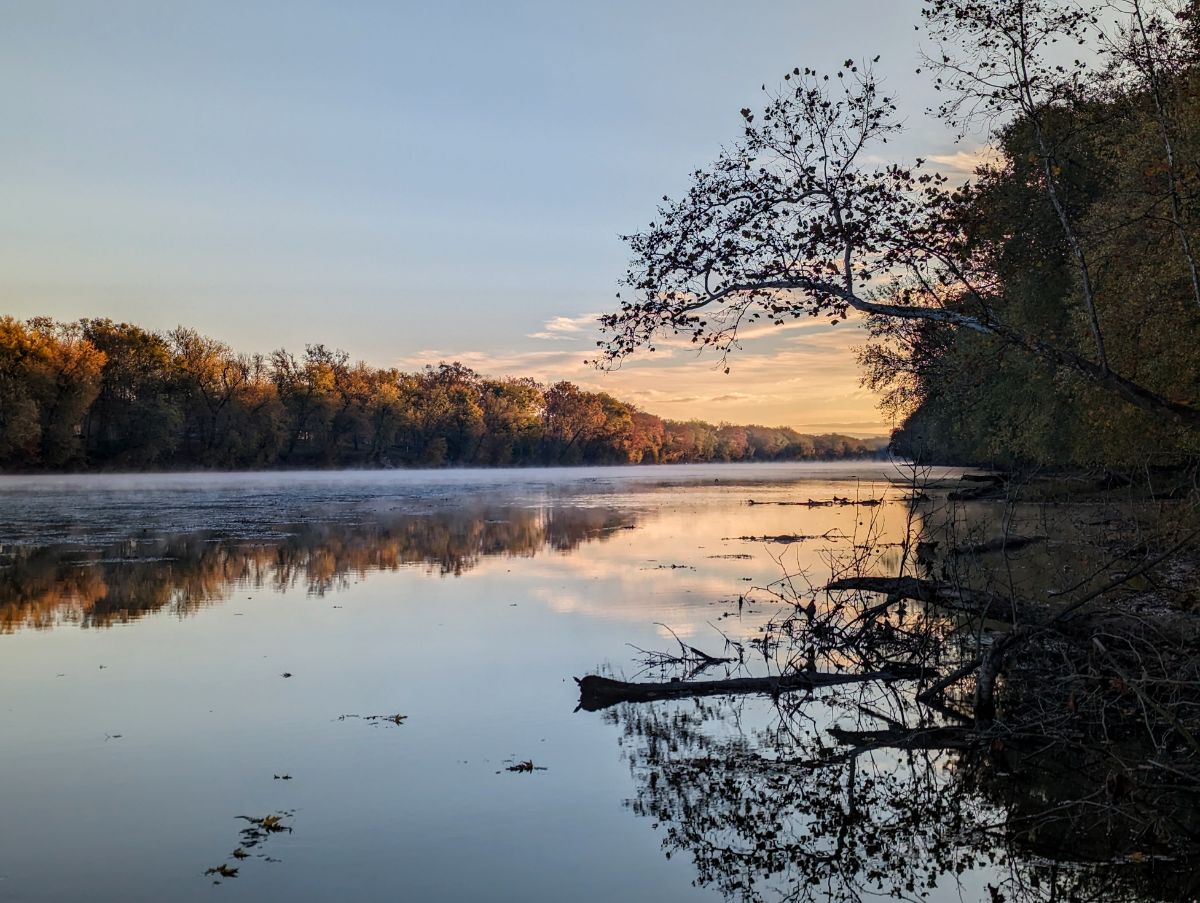
5* accommodation on the canalBreakfast in bedBeautiful morning light on the Potomac River from Devil’s Alley campsite
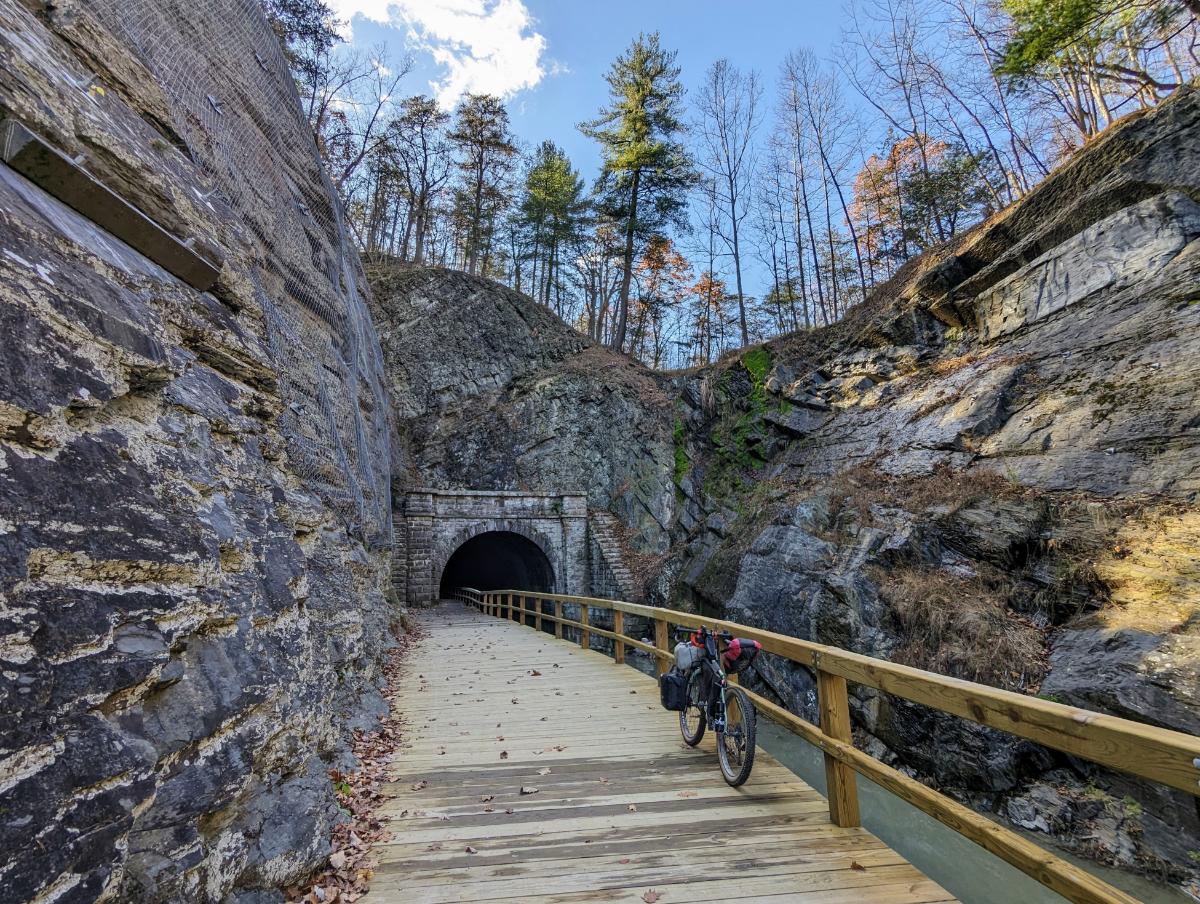
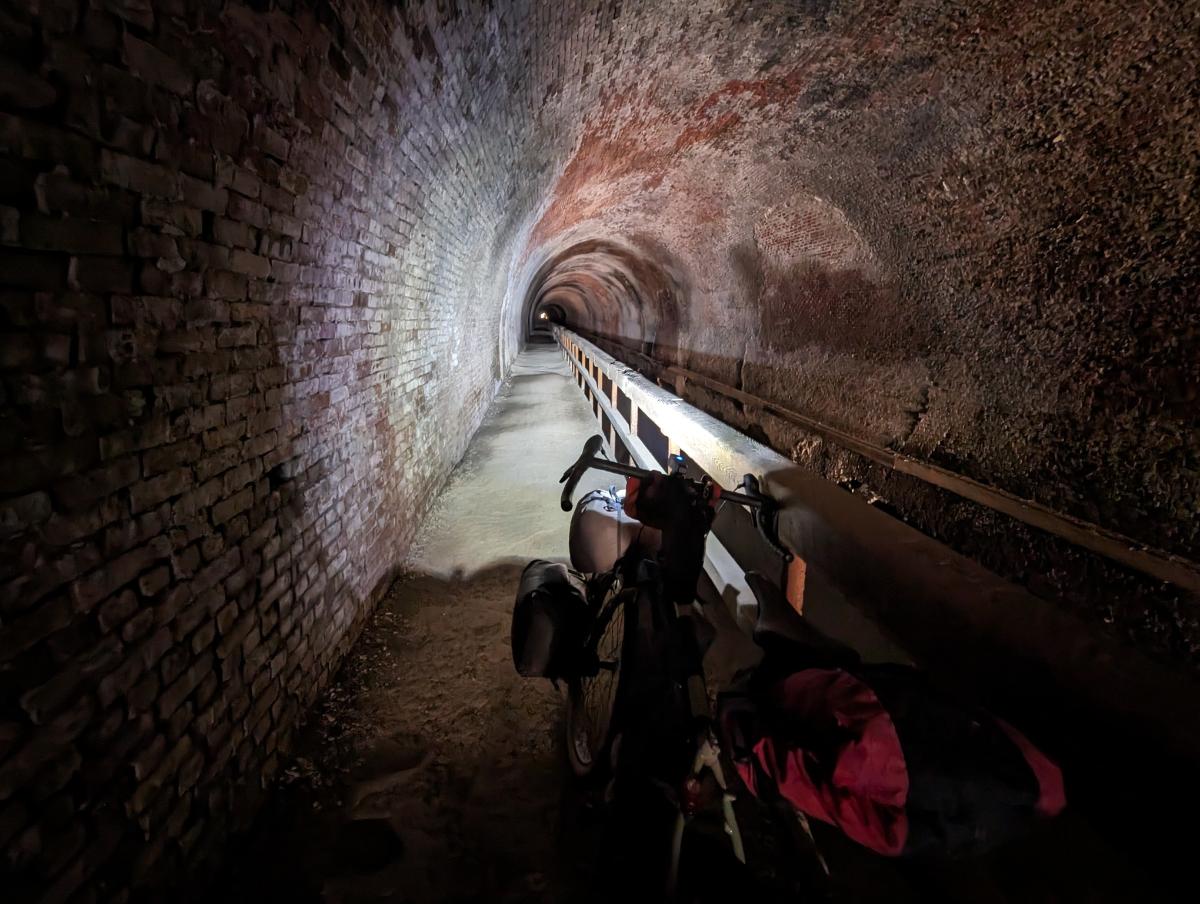
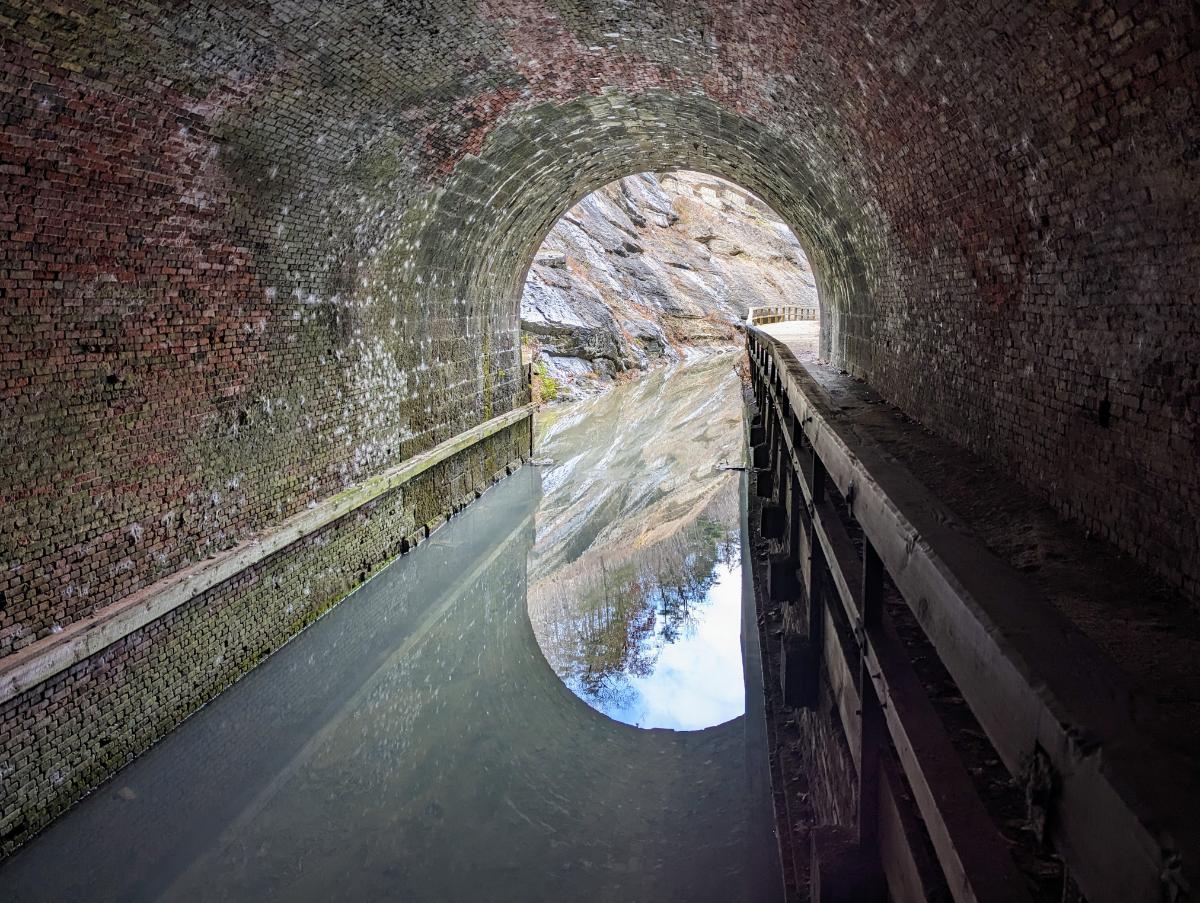
The highlight of day 2 was passing through Paw Paw tunnel again. This was my 3rd time through and it’s always impressive!
You approach the tunnel from the south through a rocky ravine, riding on a boardwalk above the canal. It’s a fantastic section of the trail.
Then you approach the tunnel proper. It’s a crazy feat of engineering given when it was built (work began in 1836 and the tunnel opened in 1850). It was one of the masterpieces of civil engineering in the mid-19th century:
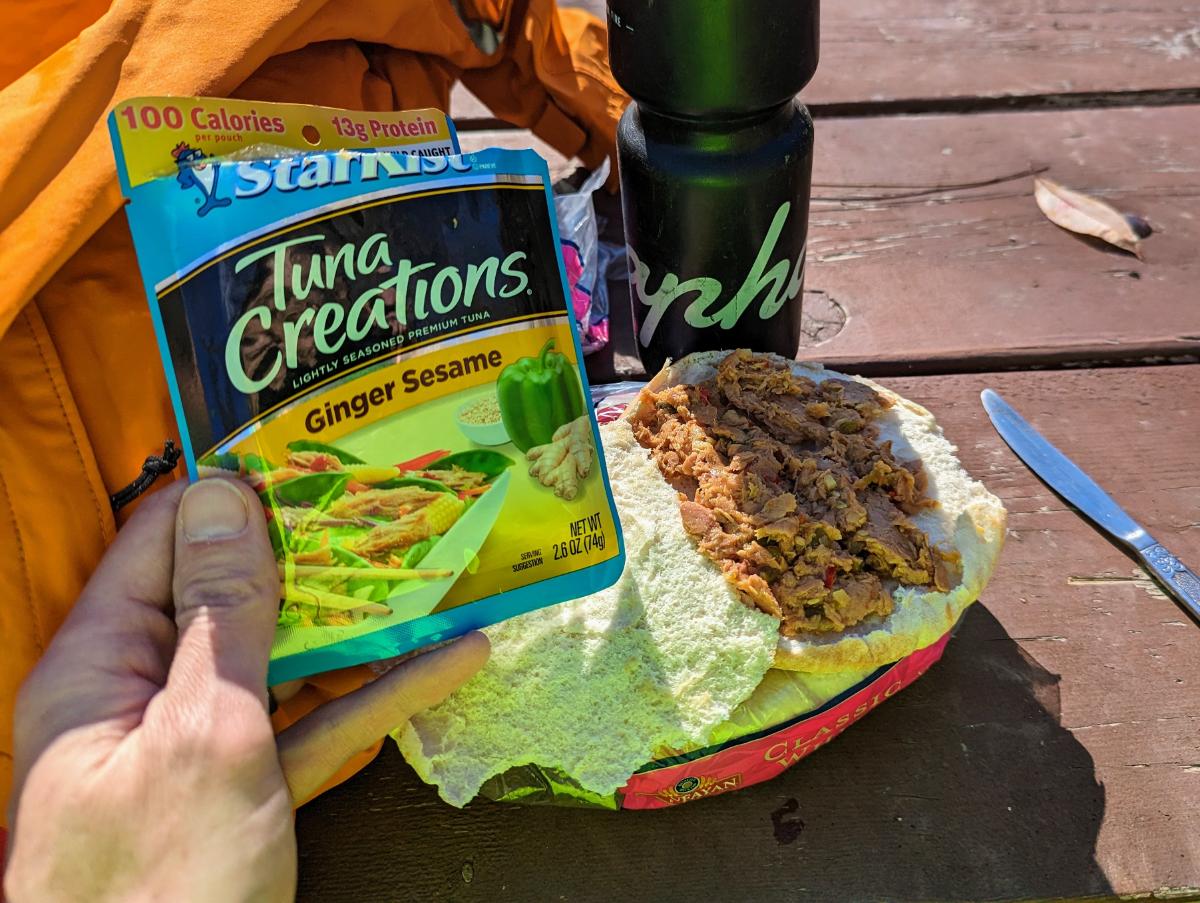
Approaching the tunnel entranceYes, it’s long. It’s very dark without lights. And almost certainly haunted.Tuna pita bread for lunch. Delicious!
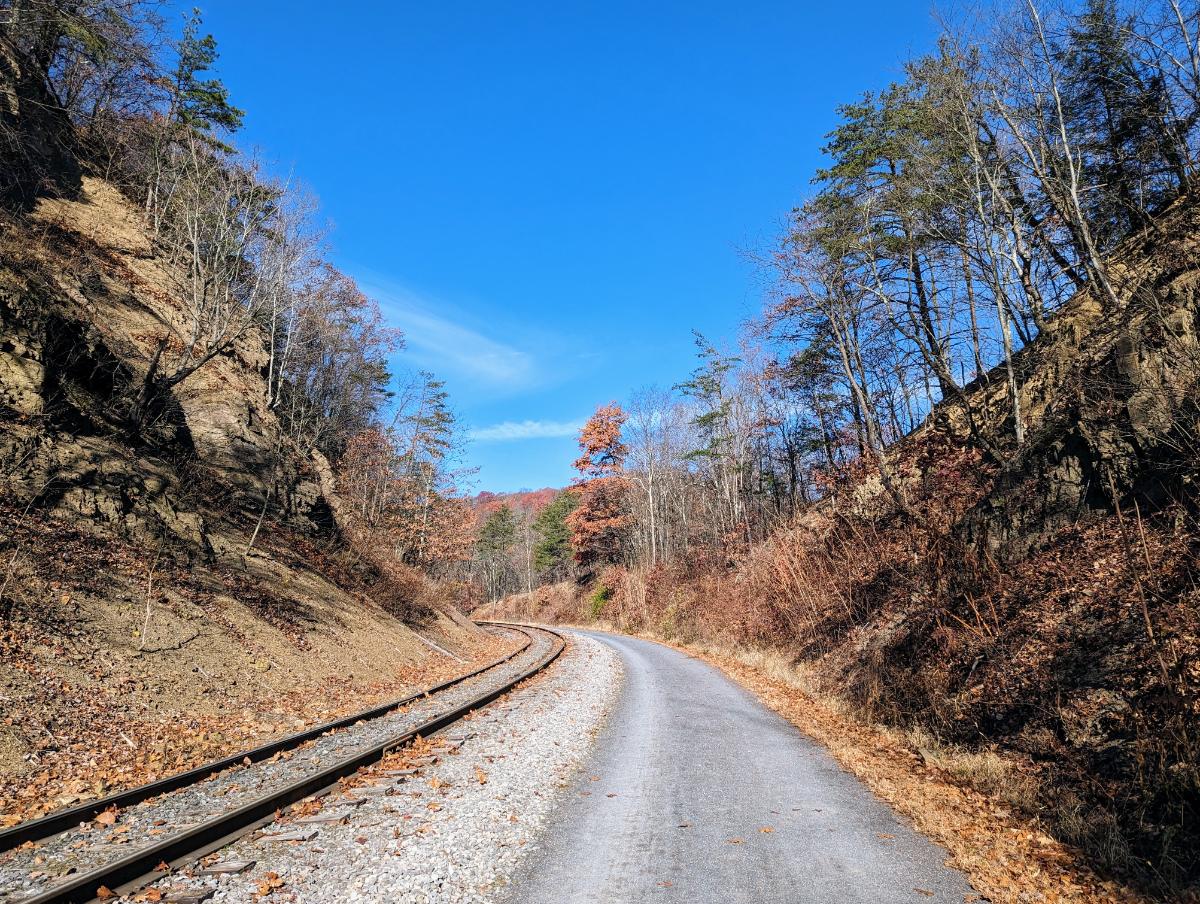
The trail beyond the Paw Paw tunnel is very scenic and quiet.
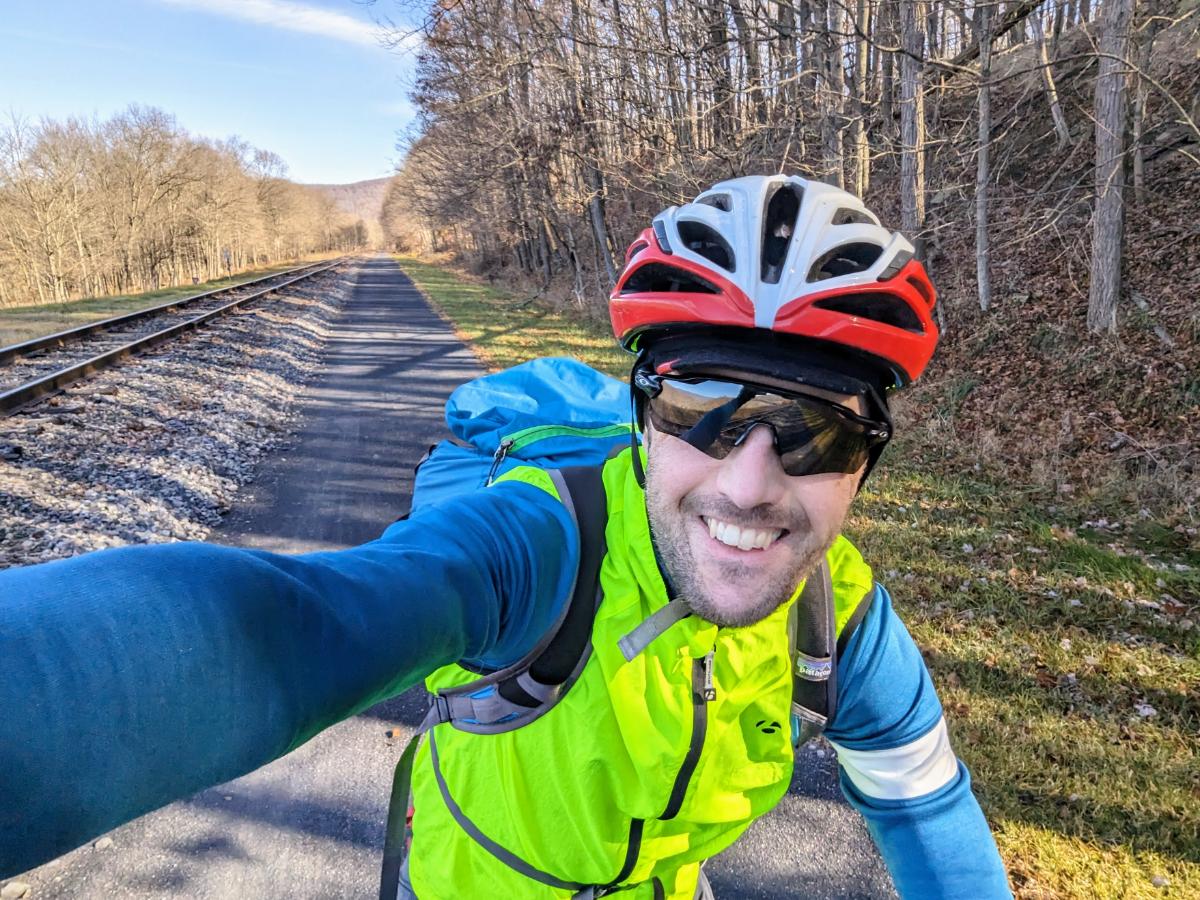
The path becomes increasingly scenic (and quieter) as you get deeper into western Maryland.Rocking the front low-rider panniers again. It worked really well on the test overnighter to Cumberland Valley last month.Reflections in the canal at Evitt’s Creek campsiteEvitt’s Creek camp alongside the Potomac River
Day 3: Evitt’s Creek campsite to Ohiopyle State Park
78.9 miles / 7 hrs 14 mins
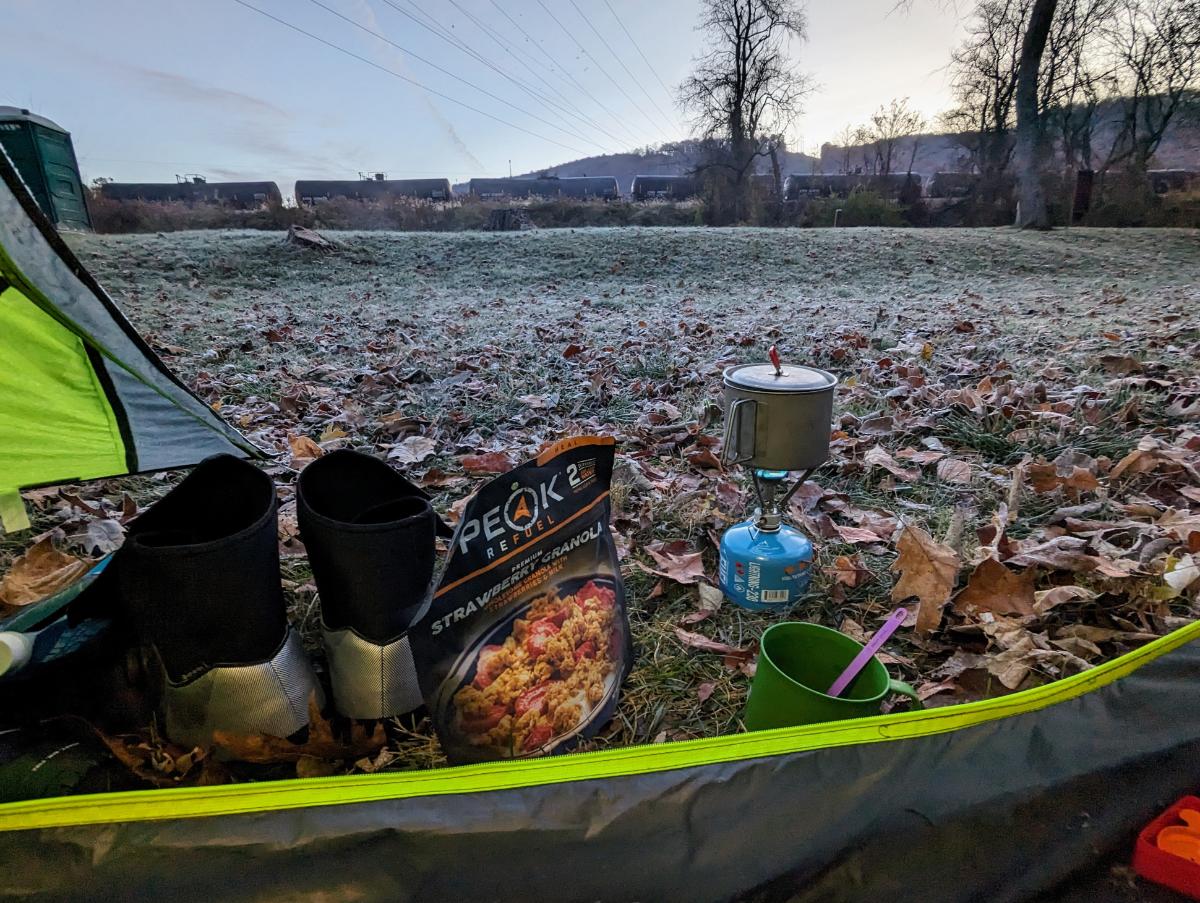
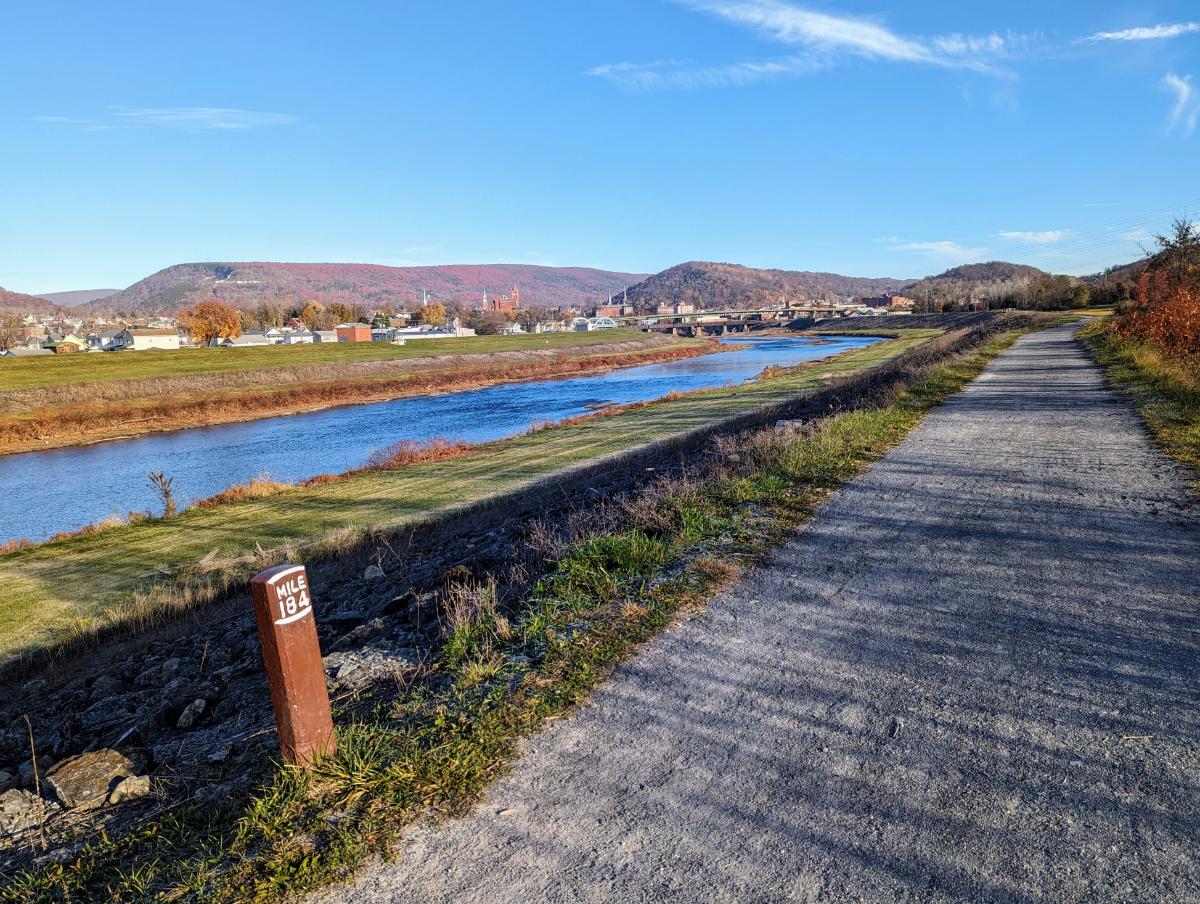
Cold morning, around 27FStrawberry Granola and coffee for breakfastThe bike was covered with a layer of frost as I set offMile 184 on the C&O canal, with Cumberland in the distanceCumberland, Maryland, where the C&O and GAP trails connect
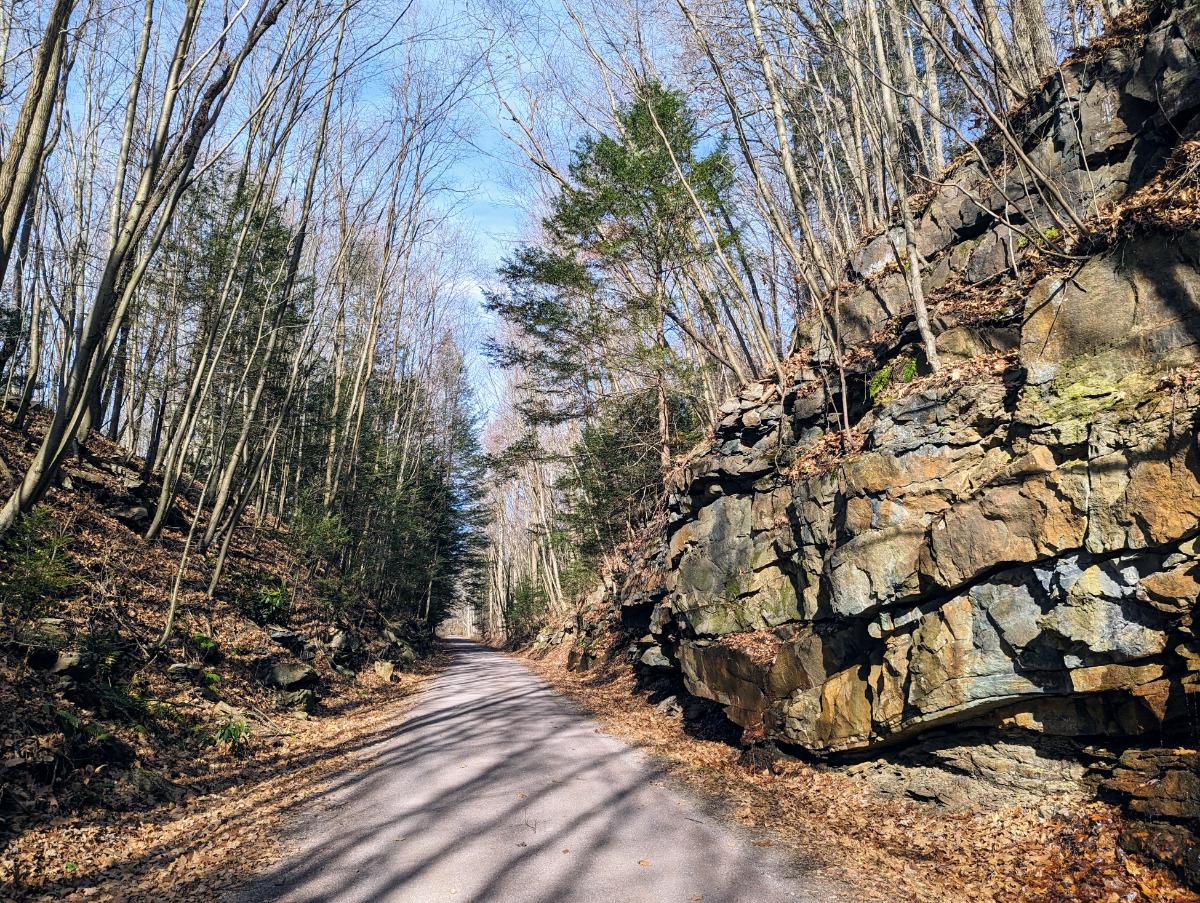
I stopped for a coffee in Cumberland and swapped the bumpy C&O canal for the smooth crushed limestone surface of the GAP trail.
The first 22 miles of the GAP trail are all uphill, at a gentle 1 – 2% gradient. Just enough for you to notice but it’s not too hard. It’s a long climb though, alongside the rail tracks for 12 miles or so. It’s a lovely ride.
On to the GAP trailEnjoying the change of scenery and smooth surface of the GAP trail.
I passed the Mason-Dixon line and officially left the south of the US and entered the north.
At the Mason-Dixon line
Shortly after, I reached the best lookout of the trip, at Big Savage mountain, just before Big Savage tunnel.
The lookout at Big Savage vistaUnder the mountain I go. Entering Big Savage tunnelThe very long, but not so dark, Big Savage tunnel.
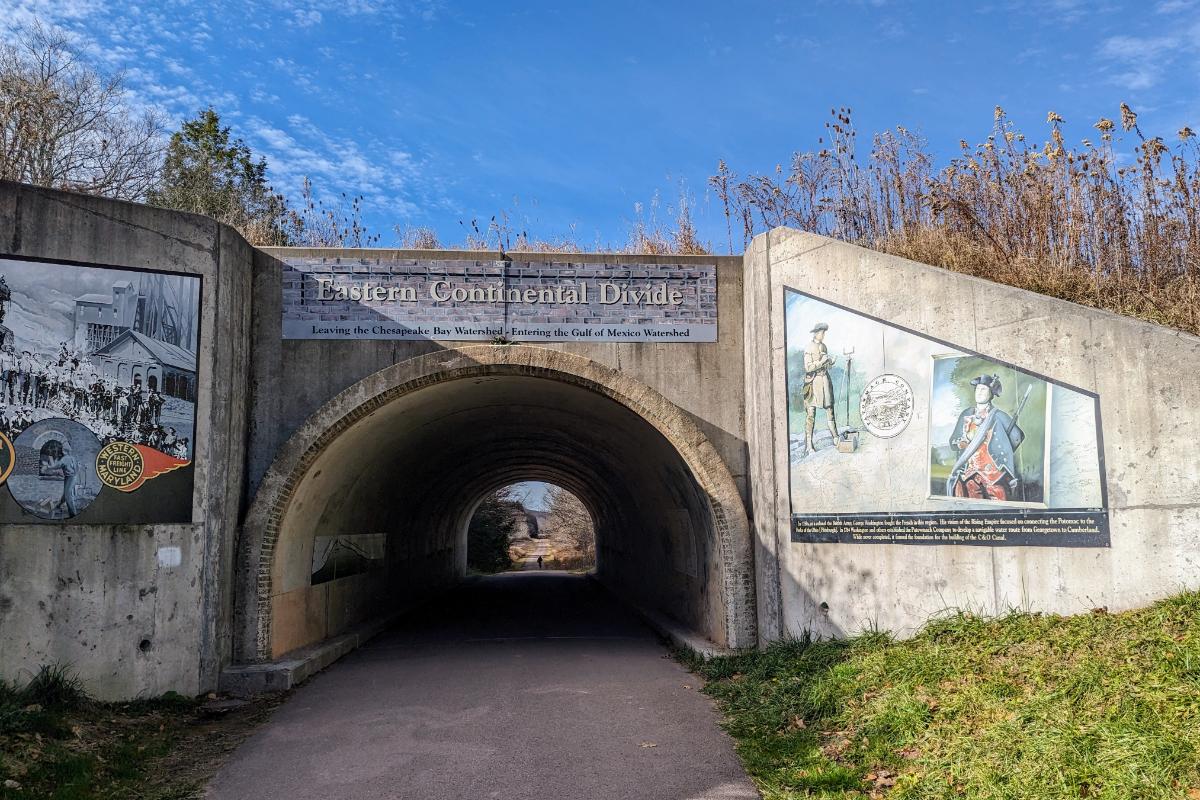
Just beyond Big Savage tunnel, I crossed the Continental Divide, the high point of the route. Any hopes of a freewheeling, coasting descent down the other side were quickly dashed however. The gradient is so gentle (around 0.5%) that you hardly notice a change. Unfortunately, you still have to pedal. It’s perhaps 5% easier though.
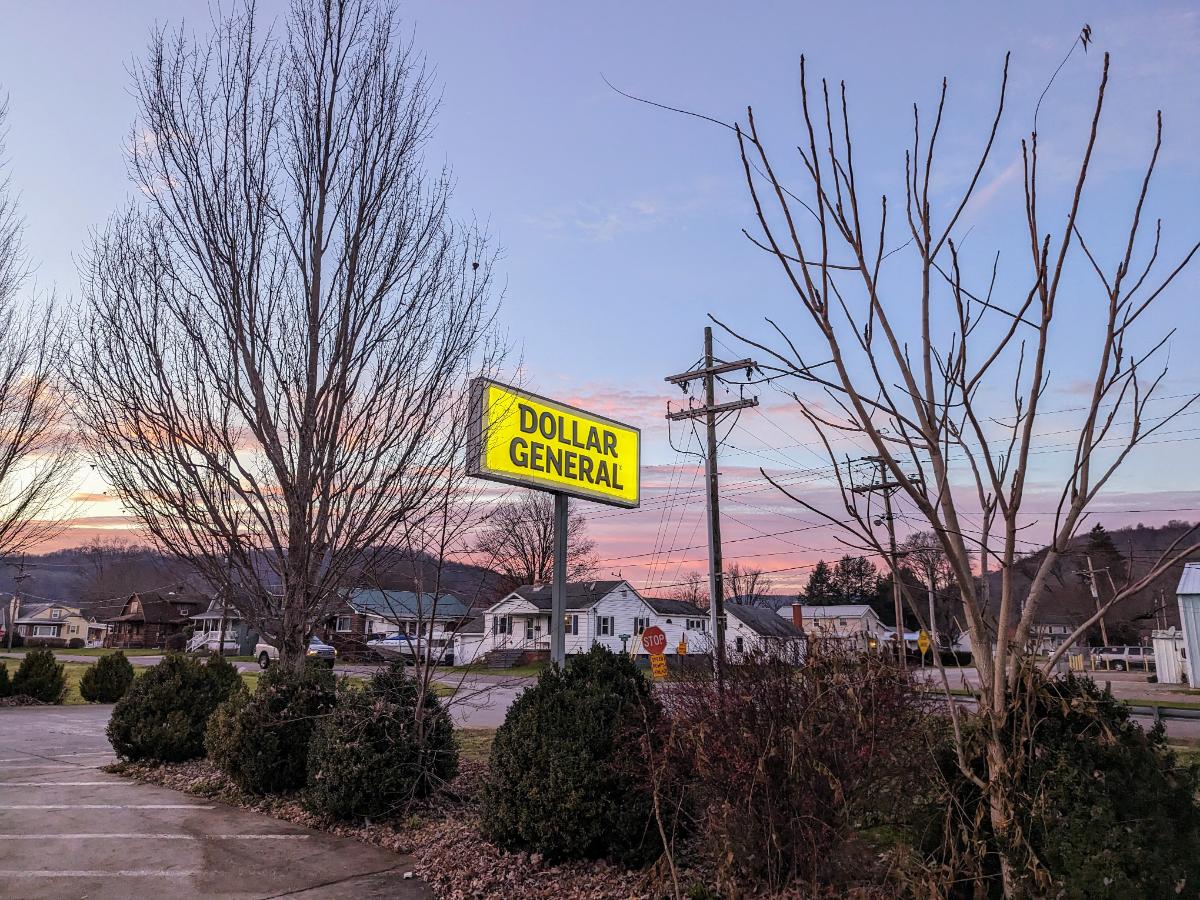
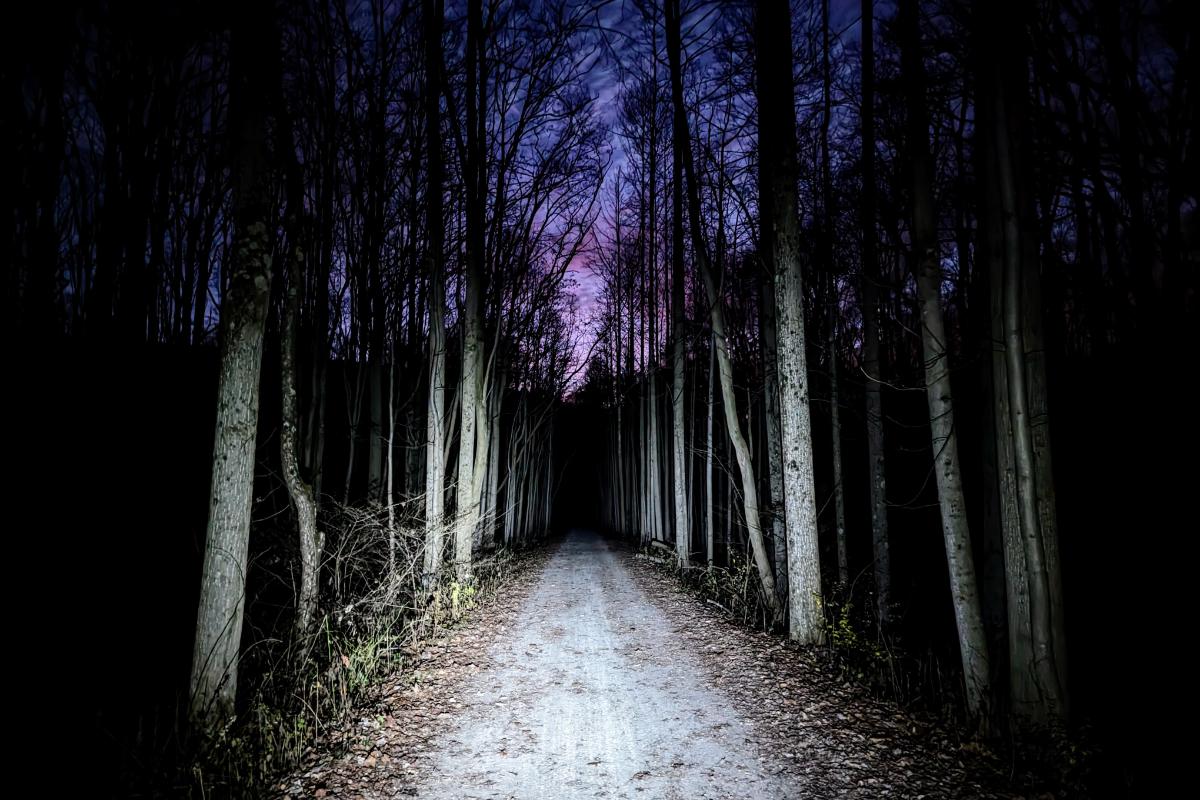
The Eastern Continental DivideCrossing Salisbury viaduct, which offered extensive views over the plainsIt was warm enough for shorts, which was nice contrast to the 27F morning!Dollar General in Confluence where I stopped to buy waterI left Confluence in the last of the daylight and rode into Ohiopyle State Park under lightsRiding into the night through Ohiopyle State Park. 90% fun, 10% intimidating.
Day 4: Ohiopyle State Park to Big Savage mountain
53.5 miles / 5 hrs 20 mins
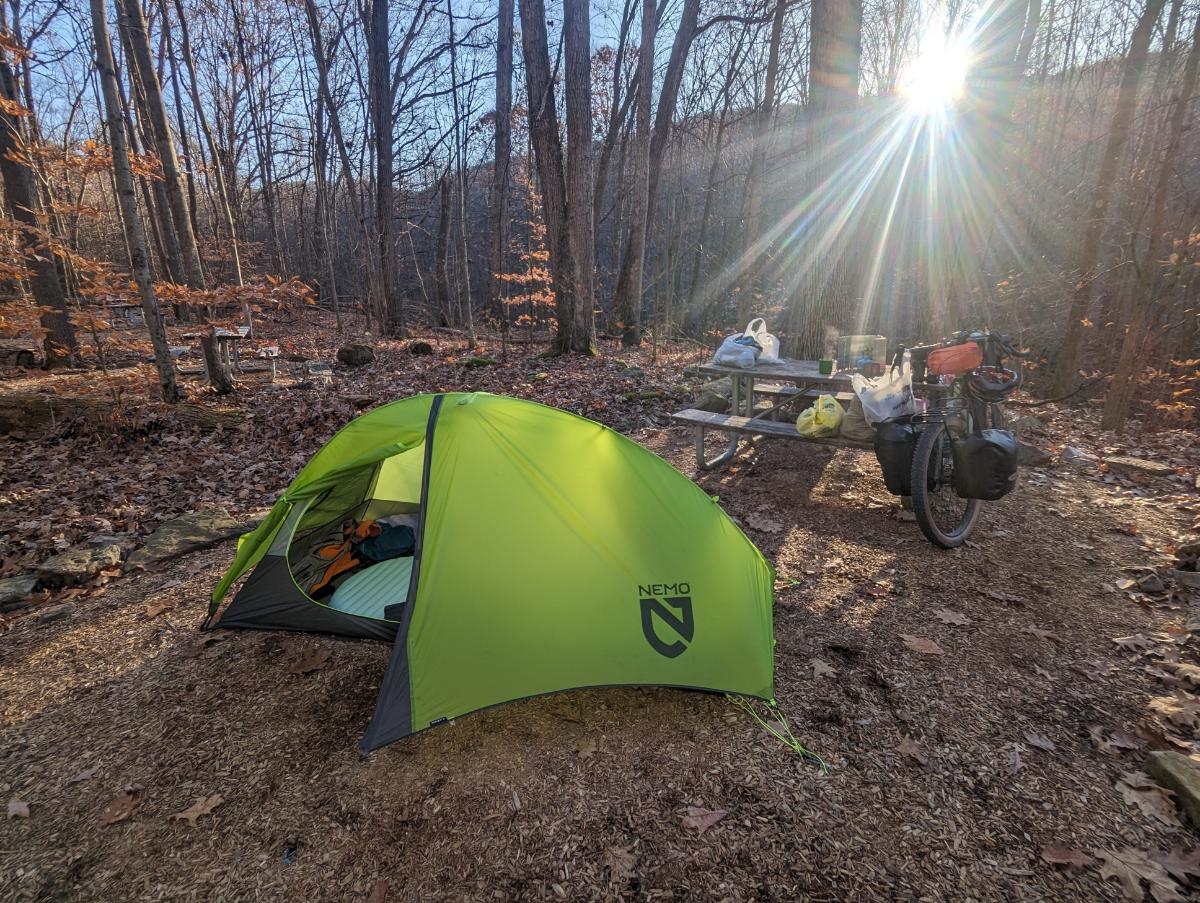
I turned around at High Bridge biker campsite, making Ohiopyle the furthest point from home of this tour.
The campsite was wonderful. Nestled in the woods, just off the GAP trail. I had it to myself and I enjoyed the sun rising over the ridge line to warm me up while I had breakfast.
High Bridge biker campsite, morning of day 4Another cold start on the morning of day 4The Casselman River from Pinkerton High BridgeWonderful scenery along the GAP trailHeading back through Big Savage tunnel on this return journeyBeautiful evening view from Big Savage lookoutDinner and a book before turning in for the night.
As the sun set, the forest behind my tent came alive. The rustling began in earnest and the darkness magnified every sound until I convinced myself that bears were all around. In all likelihood, the noises were mostly squirrels and perhaps a few deer.
At one point, I let out a few wolf howles “arooo, arooo, aroooooooo” to let animals know I was there. I nearly jumped out of my skin when something howled back from the woods. To this day, I’ve no idea what it was but I didn’t dare make that noise again. LOL.
Day 5: Big Savage mountain to Indigo Neck campsite
68.1 miles / 5 hrs 28 mins
The sunrise at Big Savage lived up to expectations. It was magnificent. I got up early, just as the first slivers of purple and orange appeared on the horizon. Distant ridgelines and layers of cloud combined to make a spectacular palette. A worthy backdrop to breakfast that morning.
Dawn on day 5It was a beautiful morning from Big Savage lookout!Best coffee spot of the trip! Big Savage mountain overlook at dawn on day 5Sun rising at Big Savage overlook
After striking camp, it was 22 miles downhill into Cumberland. It wasn’t steep enough to freewheel, but it was easy pedaling and the fastest average speed of the trip. Cor blimey, it was cold though!
After another coffee stop in Cumberland, it was back onto the C&O canal.
Lock 70 at OldtownSuper riding through one of the more remote sections of the canal, between Oldtown and Paw Paw.Passing back through the Paw Paw tunnel.Nearly there!
Day 6: Indigo Neck campsite to home
84.8 miles / 7 hrs 20 mins
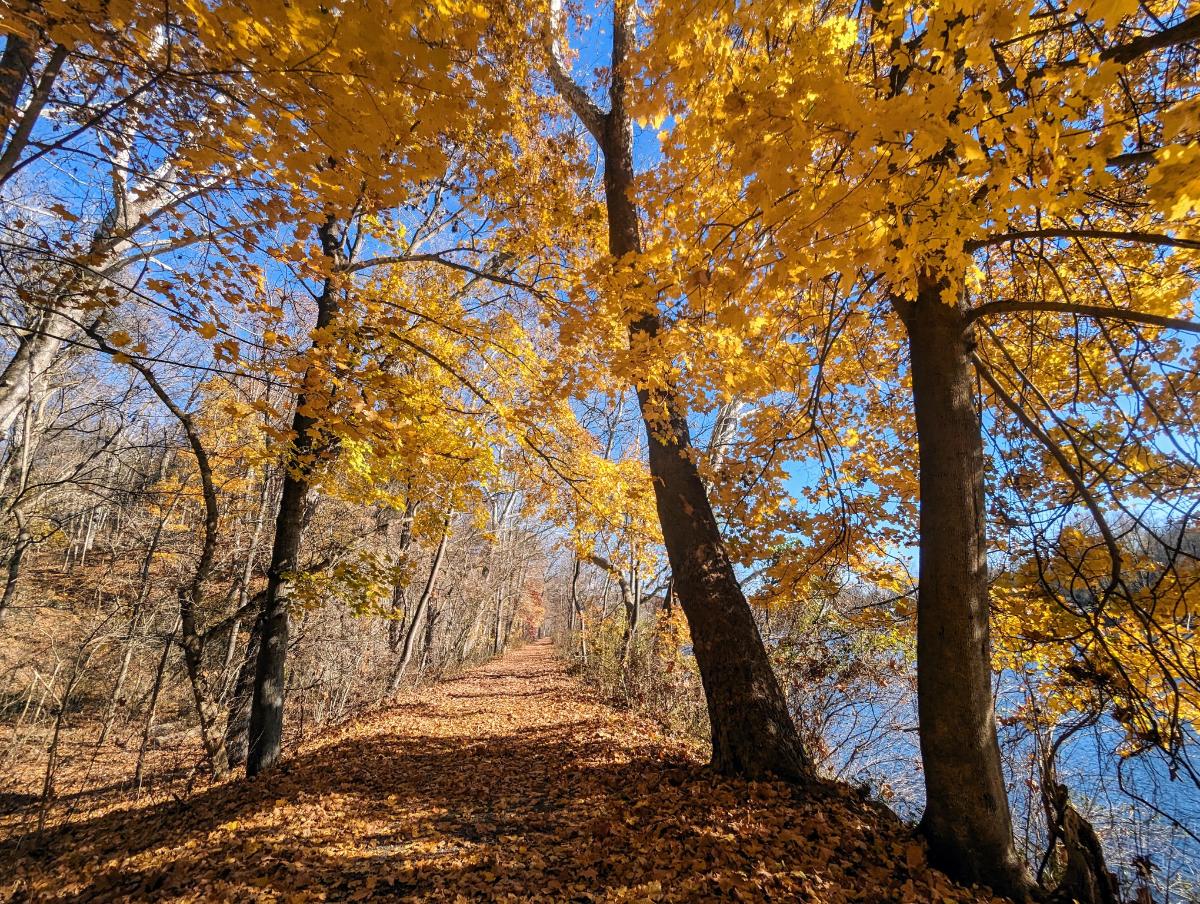
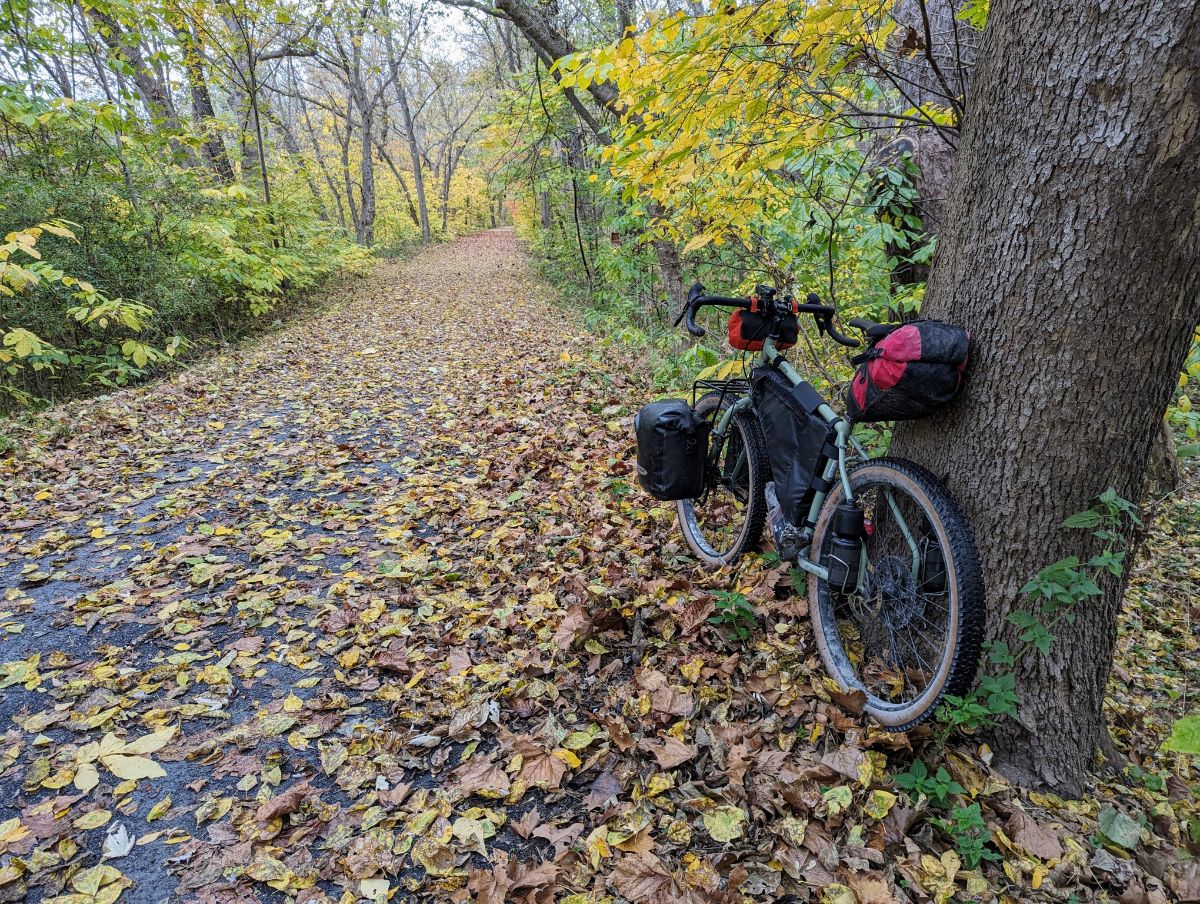
The tent at Indigo Neck hiker biker campsite on the C&OCooking a final breakfast of the tripPassing the ruins of Round Top Cement MillIt was past the peak foliage but the fall colors were still stunning.I haven’t had a McDonalds for years, but it’s always a tradition to have a Big Mac on long expeditions so I kept this alive with a stop in Williamsport on my way through.The section of trail at Big Slackwater never disappoints. Smiling because I’m so close to home now!Caught out by the short days again, I rode the last hour in the dark.
A video and photo essay from a quick overnight bike tour. I left around 3pm on Monday and was home less than 24 hours later. It’s phenomenal how much adventure and inspiration you can pack into such a short window.
Day 1: Harpers Ferry to Cumberland Valley Hiker Biker campsite
36.86 miles / 124 ft ascent / 3 hrs 15 minutes moving / 3 hrs 51 minutes elapsed
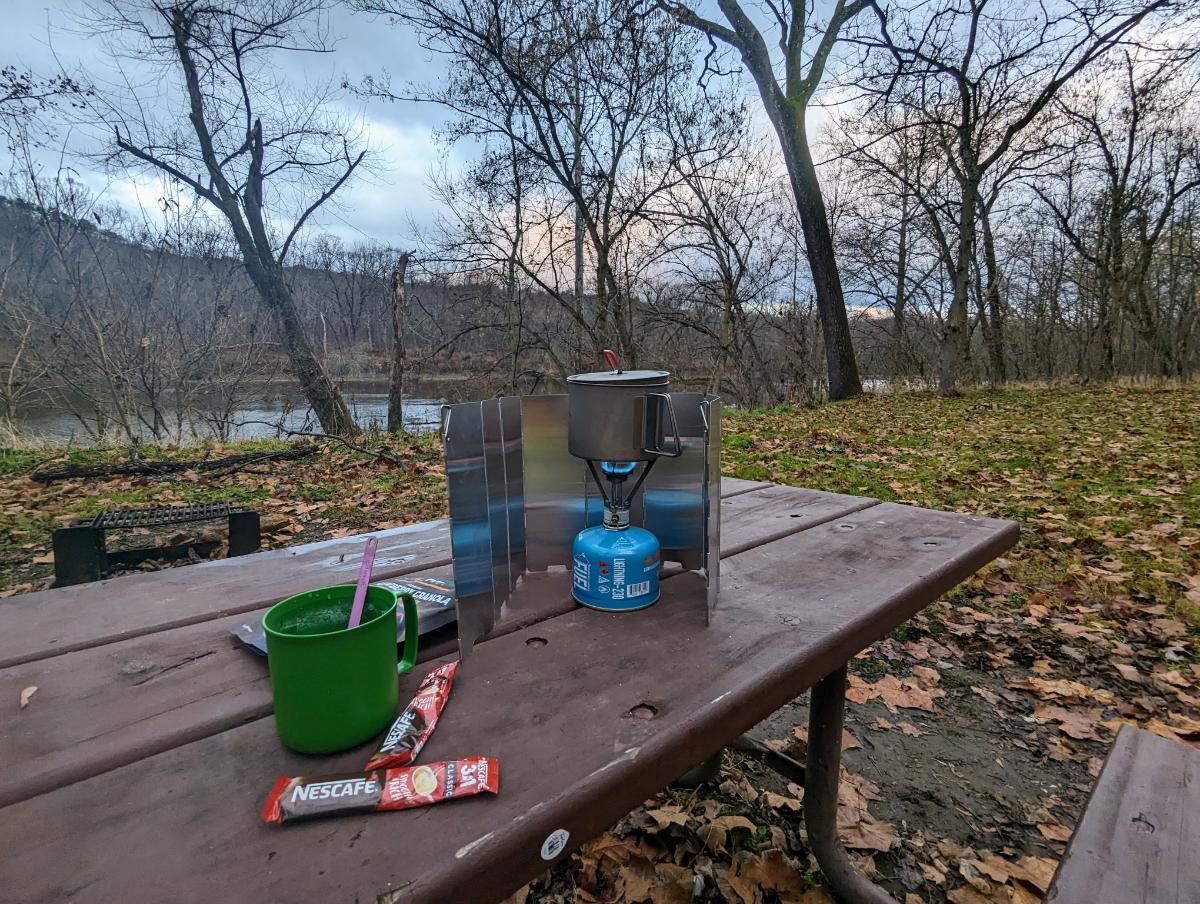
Day 1 was a race against time to make it to the campsite before dark. I made it with just enough time to pitch my tent, but cooked and ate in the dark. I ended up pitching my tent in the exact same spot that I used on the first night of last year’s Bike SUP tour.
Heading upstream towards ShepherdstownLockhouse at Canal Lock 37, near DarganThe Surly Grappler in full cryGlad I threw this light rain jacket in at the last second as I was drenched by a couple of showers during the afternoon.The leaves were inches thick on the ground in places. Slightly surreal, like riding on snow. Beautiful conditions.Moody sky from dam 4The super cool raised towpath above the river at Big Slackwater, one of the highlights of the whole C&O canal towpath.Looking downstream at Big SlackwaterLockhouse at Canal Lock 43Racing to beat the darkness and get to Cumberland Valley hiker biker campsiteCamp at Cumberland Valley Hiker Biker campsitePro tip for getting water from the pumps… use a funnel to speed up the process!Making dinner in the dark. The chili dish was delicious.
Day 2: Cumberland Valley to Williamsport, then return to Harpers Ferry
47.85 miles / 431 ft ascent / 4 hrs 29 minutes moving / 6 hrs 8 minutes elapsed
It was fairly cold in the morning so I didn’t rush. I enjoyed breakfast from the warmth of my sleeping bag before breaking camp. I rode up to Williamsport to check it out before turning around and riding home.
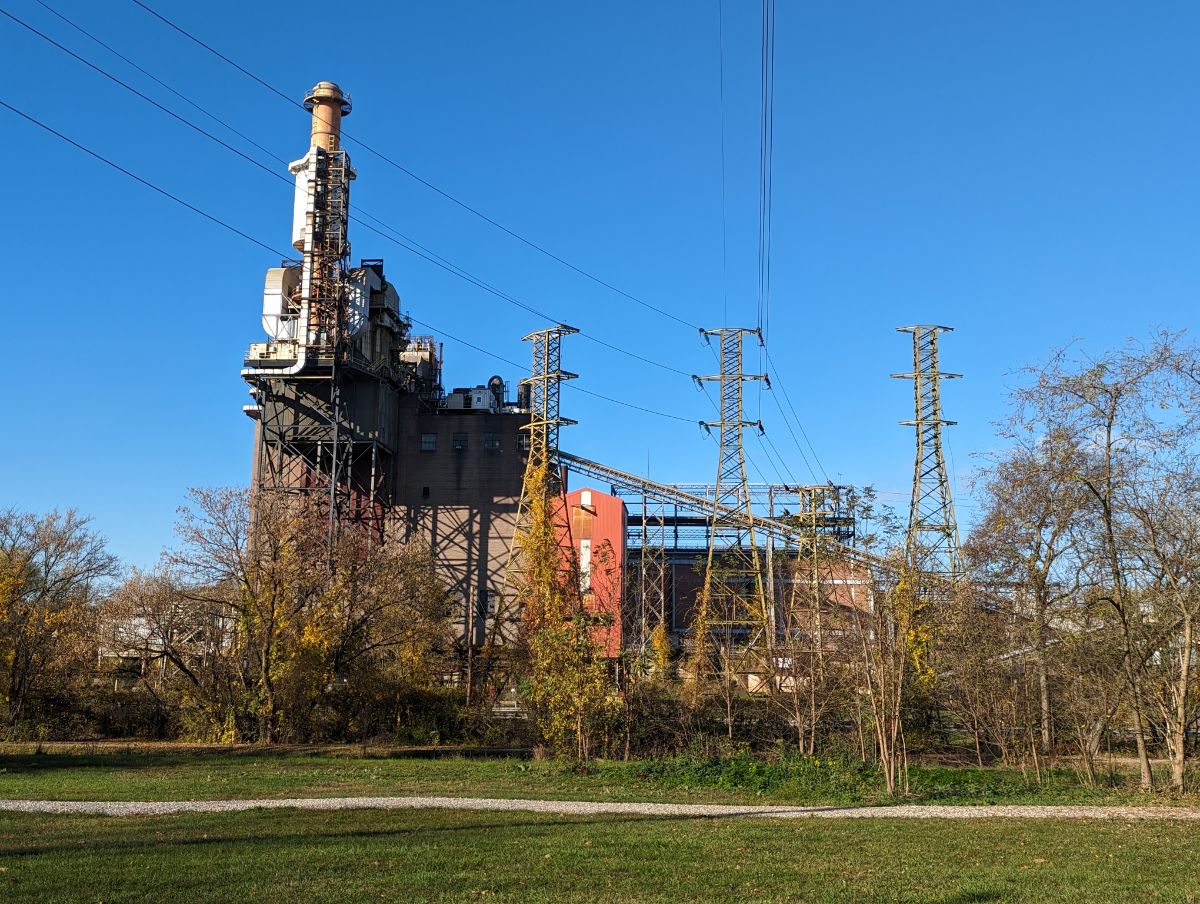
Camp on the morning of day 2Breakfast on day 2Back in my sleeping bag to enjoy the coffee! ☕Good morning from camp on day 2Beautiful sunrise on the river. So calm and peaceful!Stunning morning on the Potomac RiverPassing under the I81 bridge on the way up to WilliamsportConococheague Aqueduct at Williamsport, where I turned around for home.The derelict R. Paul Smith Power Station at WilliamsportLock 44 on the C&O canalMile 92.5, the mid-point of the C&O canalBack at Big Slackwater but heading downstream, and the sun is shining! The section around Big Slackwater never disappoints.Riding the elevated trail at Big Slackwater, one of the best sections of the C&O CanalMcMahon’s MillCave biking? Exploring one of the many caves along this section of the routeOne of the bigger cavesCrunching across a carpet of golden leavesTime for a final brew before home, at Big Woods campsiteThe serene Potomac River from near Dargan
Bike Setup
For this tour, I ran a set of front low rider panniers to hold sleeping gear and clothes. They’re a pair of 20-year old Vaude Sport panniers — veterans of my Norway tour — that are still going strong!
The Revelate Designs main triangle frame bag held camp stuff and tent poles. The seat pack held the tent and cook pot. I used the extra bottle bosses on the rear triangle to hold two bottles, although they were inaccessible whilst riding. But that’s not an issue on a tour like this where I’m making frequent stops to explore and take photos.
Bike / 141.7 miles / 3,265 ft ascent / 11 hrs 05 min moving / 12 hrs 54 min elapsed
Feeling vaguely fit after the recent Gran Fondo ride, I wanted to tick off another big ride before the end of the summer.
I’ve ridden a similar loop to this one twice before, although starting from DC both times and turning around at Point of Rocks rather than Harpers Ferry (first time was a 2-day tour, second time as a 130+ mile single day).
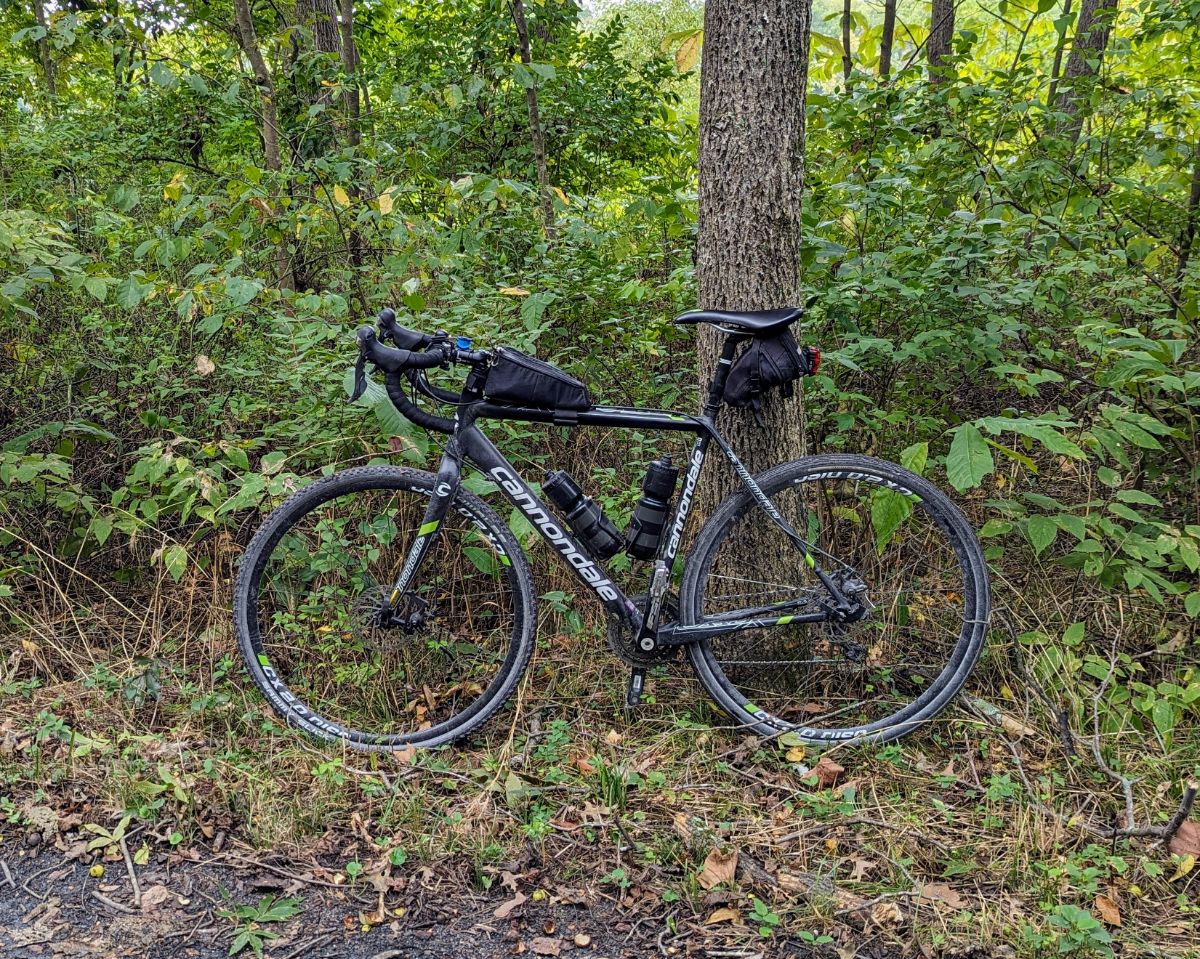
I left early, but not alpine-start early now that the heat was back to normal levels instead of head-meltingly hot. As I rode the C&O canal into DC, I thought there was no way I could complete the full distance. I just didn’t feel that good. But I reminded myself that it often feels like this on longer rides, you just gotta ride into it. Sure enough, as I got further into the ride I actually felt better. Miles 20 – 40 were some of the hardest of the whole ride.
At Brunswick 7.30am. Feeling ok, but honestly feeling like I had no idea how I was going to ride 140 miles that day. The only thing you can do is ride to the next checkpoint, then keep going and pick off the next one. Repeat until you get to the end of the ride. Simple, really.Point of Rocks bridge in the morning lightMy trusty Cannondale Caadx, still going strong after 10 years. A perfect bike for this kind of mixed surface riding.Potomac River Gorge, from Mary’s Wall in Great Falls ParkEnjoying the serenity for a few seconds. Great Falls is always crowded on the weekend.Lockhouse 6 along the C&O canal
I had a great cake and coffee stop in Georgetown, DC, at High Road Cycling cafe. I was envious of the cyclists who get to ride from there and hang out there. But 5 minutes later, when I was dealing with the DC traffic, I realized that it’s a perk I’m willing to sacrifice to live out in the countryside where the riding is 🤌
Coffee and cake in Georgetown at the excellent High Road Cycling cafe (no longer open)
The section through DC on the Mount Vernon trail was pure madness on this Saturday lunchtime. Bikes and people flying in every direction, strollers meandering aimlessly through bike lanes, people stepping out to take selfies, etc., etc. You gotta keep your wits about you!
It quietened down when I turned on to the Four Mile run trail and then the W&OD.
Rosslyn skyline from the DC side of the Potomac River. Lots of memories from living here.The Washington Monument from the Mount Vernon trail. Very busy on a Saturday afternoon.
From the Mount Vernon trail, I jumped across to the much quieter Four Mile Run trail, which follows the Four Mile Run creek. It’s surprisingly wild amongst the dense suburbia on each side. I love these kinds of trails that snake through dense urban areas, which I think stems from when I lived in London and used to explore the canals of East London.
Four Mile Run trail
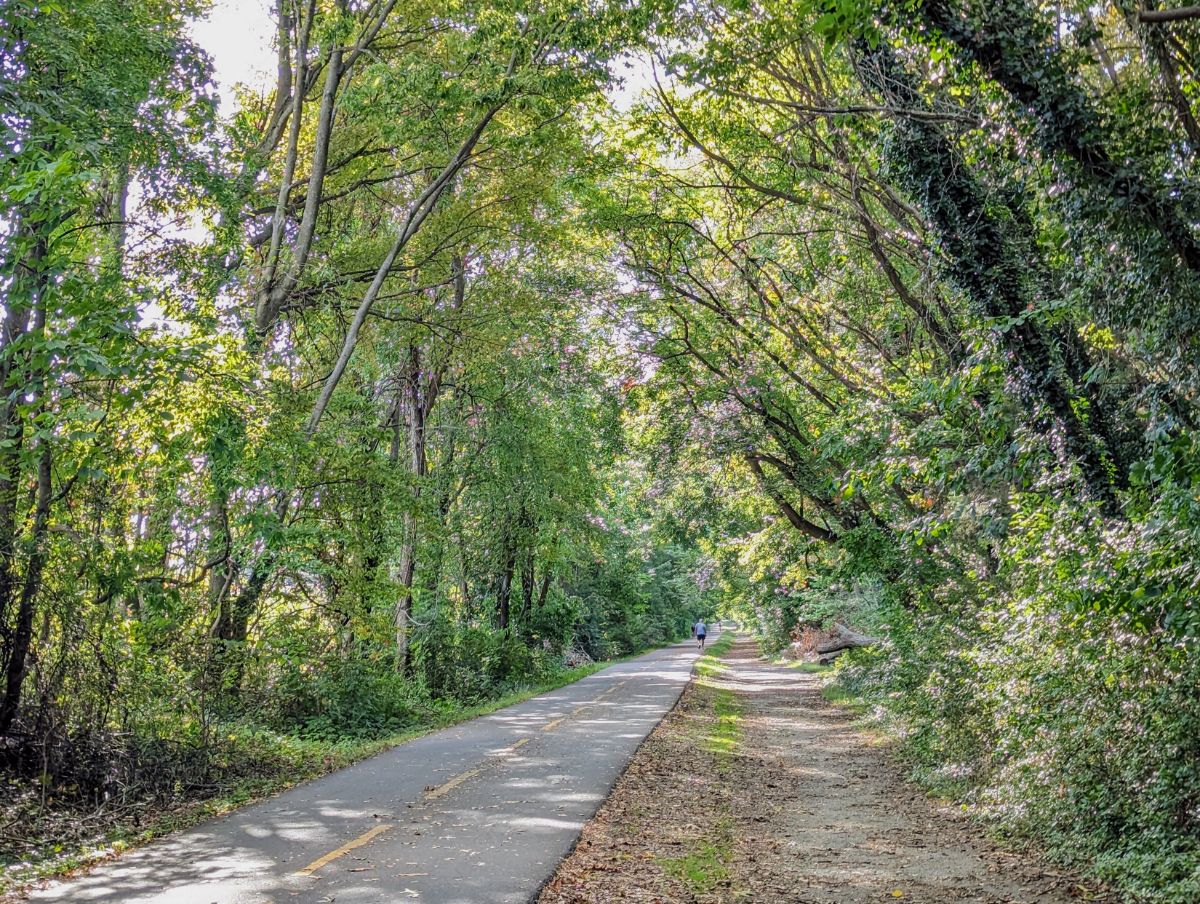
I really enjoyed riding the W&OD again, such a great trail. It gets better as you get further out, with fewer road intersections and fewer people. I rode slowly to ensure I had enough energy to make it home. Didn’t want to collapse into a heap on the side of the road somewhere and have to call for a pick up.
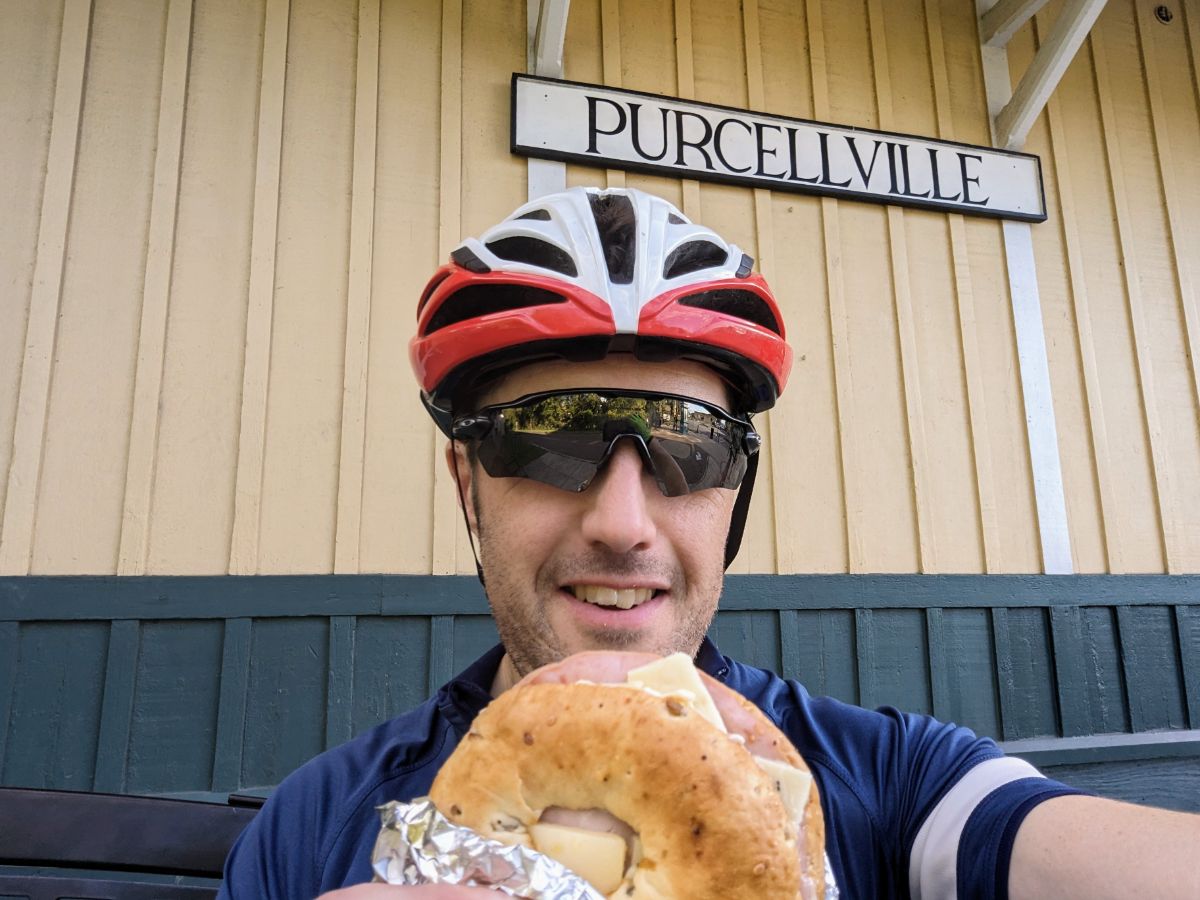
The half-way point and feeling somewhat relieved to have made it this far. 70 miles down, 70 to go!The W&OD trail is a fantastic trail through the super busy NoVA area. Miles and miles of this. Very scenic, if you can look past the powerlines. It felt interminable though, with the mile markers passing very slowly.Plenty of history along the route, although I just kept cycling and snapped this pic as I went past. Someday I’ll learn to slow down and take it all in 😉Smiths Switch Station, where I refilled with waterBetween Leesburg and Purcellville, the trail is very pretty.One of the hardest aspects of these longer rides is taking on enough calories. After a while, all the energy bars and electrolyte drinks become unpalatable. Time to go back to basics with a ham and cheese bagel!
At the end of the W&OD, I had 20 miles of backroads to reach the C&O again. I didn’t know what to expect, I was mostly just hoping that the traffic was light. And gladly, it was! The roads were fantastic for riding (if you like gravel) and, apart from a few mega bumpy washouts, were in good shape. Plus, the evening light was divine so that was a nice bonus.
From Purcellville I had ~25 miles to get home, mostly on super quiet back roads, most of which were gravel.Beautiful evening for a ride and still feeling quite chipper after 110 milesThe scenery and evening light were sublime, making for really fun miles.Cruising along the gravel roads and enjoying the views
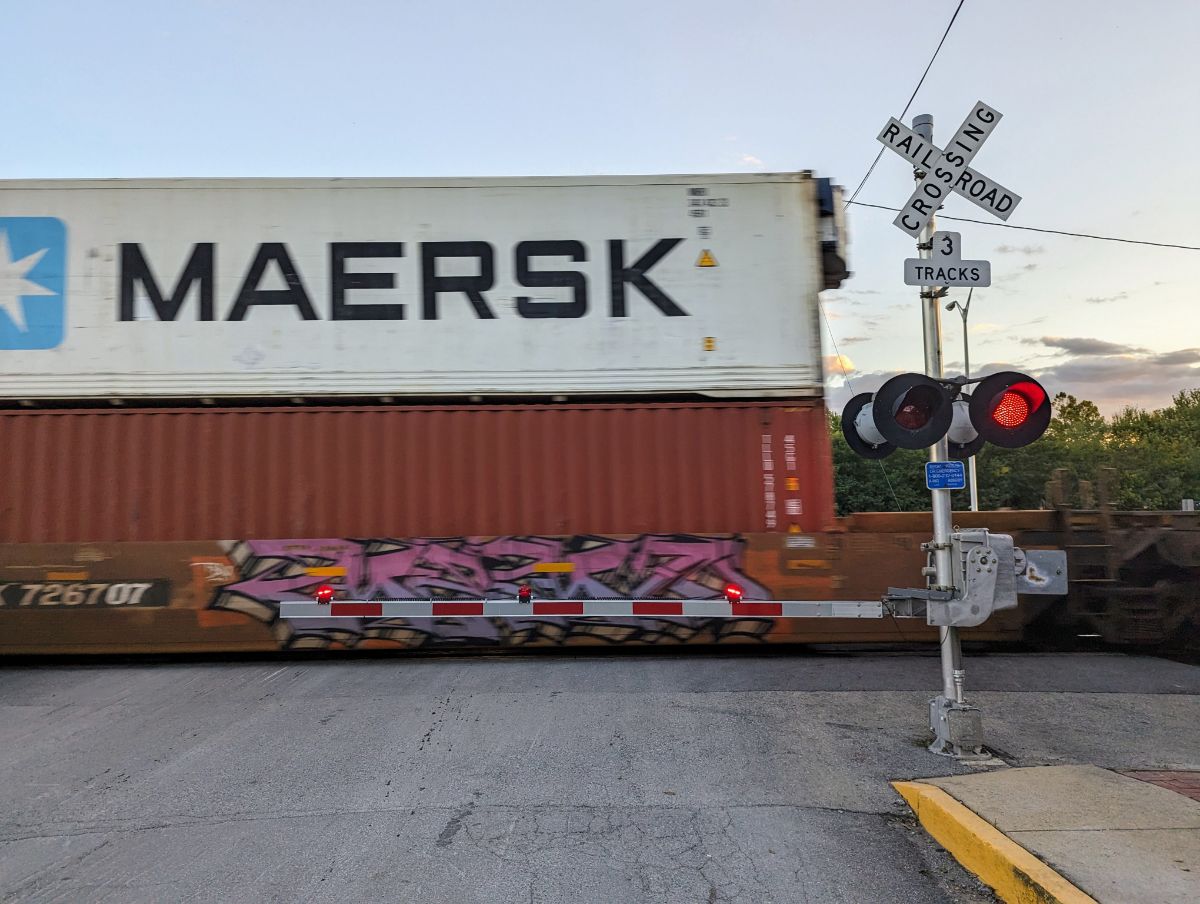
I raced to Brunswick to see if I could catch the sunset from a vantage point by the river, but this train crossing thwarted me. I was stuck here for 5 minutes. When I reached the canal again, I raced to find a break in the trees to see the sunset but I was slightly too late. C’est la vie!
Brunswick train crossingFinal miles along the canal to race home. It was much darker than the photo suggests by this point.The best sunset photo I could get… in person, it was beautiful.
After all that sprinting, I realized I was pretty tired, so I cruised the last couple of miles to home under lights.
Great day out on the bike!
I think I’ll make this an annual ride and try to do it a little quicker next time.